Tech Ideas & Best Practices
In your Microsoft 365Tenant, there may be a lot of workflows running numerous times every day some execute automatically, some follow a schedule, and others trigger instantly upon user requests. Additionally, Desktop Flows are used to integrate with legacy systems. As a result, multiple workflows operate simultaneously to meet various requirements.
With many workflows running, several challenges arise:
- Monitoring each flow is time-consuming.
- Validating execution times can be complex.
- Flow owners receive summary notifications for failed workflows but must manually check each one to diagnose issues.
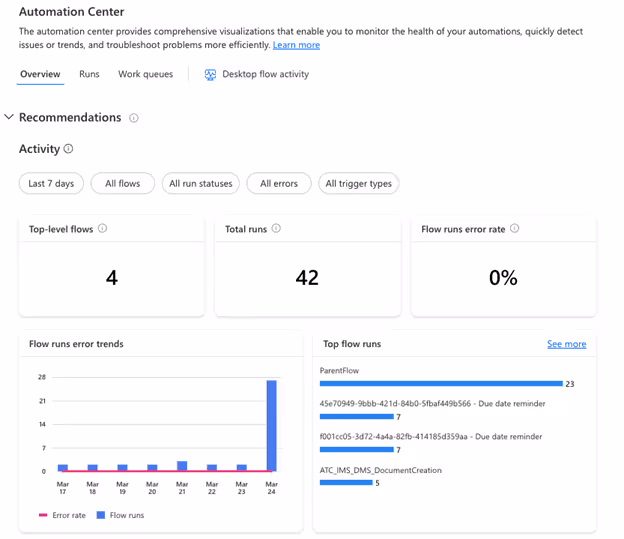
To overcome these challenges, Microsoft introduced the Automation Center.
What is a Power Platform Automation Center?
The Automation Center in Power Platform is a central hub for tracking and managing automation in Power Automate. It helps different users, like creators, operators, CoE team members, and business analysts, to oversee and improve their automation processes. With a clear, all-in-one view of automation data, it makes it easier to gain insights and improve the efficiency of their automation workflows.
Key Features of the Automation Center
- Overview Tab: The Overview tab in the Automation Center gives you a clear, high-level view of their automation performance. It tracks all related cloud and desktop flow runs, allowing you to monitor the entire process from start to finish. With insights on total runs, success rates, and key performance metrics, you can quickly identify trends, ensure smooth operations, and optimize workflows for better efficiency.
- Runs and Process Map Pages: These pages provide clear visuals and data on your cloud and desktop automation runs, helping you quickly see if your workflows are successful or need attention. With detailed insights into each step, business users can make informed decisions to improve efficiency and ensure smooth operations.

- Recommendations: The Automation Center provides proactive and reactive suggestions to enhance the reliability, efficiency, and general health of your automation. These recommendations follow the best practices and offer actionable insights to improve your workflow.
- Integrated Copilot: The Automation Center includes an integrated copilot that assists you in navigating the platform and optimizing their automation processes. The copilot provides guidance and support, making it easier for you to manage their workflows effectively.

- User-Friendly Interface: With its intuitive dashboard and user-friendly interface, the Automation Center enables users to access and analyze automation-related data effortlessly. The platform's design ensures that users can quickly find the information they need and take appropriate actions to optimize their workflows.

Boosting Your Business with the Automation Center in Power Platform
In your Microsoft 365 Tenant, there may be a lot of workflows running numerous times every day some execute automatically,

What is PowerApps and How Can It Benefit Your Business?
Feeling overwhelmed by repetitive tasks? Struggling with outdated systems that are slowing down your workflow? In today's fast-paced business environment, streamlining workflows and boosting productivity is crucial for success. This is where PowerApps comes in.
PowerApps is a powerful low-code development platform from Microsoft. It helps you to develop customized business applications without requiring a deep understanding of coding. Think of it as a user-friendly tool that allows you to build solutions specifically tailored to your unique needs.
Here are just a few key benefits of using PowerApps
- Increased Efficiency: Automate repetitive tasks and manual processes, freeing up valuable time for your team to focus on higher-level work.
- Improved Productivity: Streamline workflows and provide employees with the tools they need to get things done faster and more efficiently.
- Enhanced Collaboration: Facilitate teamwork and information sharing through collaborative applications that connect your workforce.
- Reduced Costs: Save time and money by building custom solutions in-house, instead of relying on expensive traditional development or third-party software.
- Scalability and Flexibility: PowerApps applications can grow and adapt alongside your business needs, ensuring your tools continue to support your evolving workflows.
Top 10 PowerApps Templates to Streamline Your Workflow
Now that you understand the power of PowerApps, let's explore some of the most valuable pre-built templates available. These Free PowerApps Templates offer a great starting point to address common business challenges and can be easily customized to fit your specific needs.
1. Expense Tracker
Say goodbye to paper receipts and manual expense reports! This user-friendly template allows employees to easily capture and submit expense details on the go, with automatic calculations and clear categorization. Managers can review and approve submissions within the app, saving everyone time and frustration.
2. Inventory Management
Never run out of stock again! This template provides real-time insights into your inventory levels. Track product details, quantities, and reorder points, all within a centralized and accessible platform. Generate reports to identify trends and optimize your ordering process for maximum efficiency.
3. Leave Request and Approval
Streamline your leave request process with this intuitive template. Employees can submit requests with clear details and justifications, while managers can review and approve or deny leave electronically. Automated notifications keep everyone informed throughout the process, eliminating the need for email back-and-forth.
4. Customer Relationship Management (CRM)
Build stronger customer relationships with a custom CRM template. Track customer interactions, manage leads, and oversee sales pipelines, all within a user-friendly interface. This template allows you to centralize customer data, personalize interactions, and improve overall customer satisfaction.
5. Survey and Feedback
Capture valuable insights from employees, customers, or stakeholders with a customizable survey template. Design surveys with various question formats, gather real-time data, and analyze results visually. Utilize this feedback to improve processes, identify areas for improvement, and gain a deeper understanding of your target audience.
6. Asset Management
Keep track of your company assets with this comprehensive template. Log asset details, track maintenance schedules, and monitor locations, all within a central platform. This streamlines asset management, reduces loss, and ensures preventative maintenance is performed on time.

Supercharge Your Workflow: Top 10 PowerApps Templates and How They Benefit Your Business
Feeling overwhelmed by repetitive tasks? Struggling without dated systems that are slowing down your workflow? In today's fast-paced business environment,

Introduction
In the modern era of data management and analysis, seamless integration between platforms is paramount. SharePoint, a widely used collaboration tool, often houses valuable data that organizations need to leverage for decision-making. Power Pages, on the other hand, offers robust capabilities for data visualization and analysis. By syncing data from SharePoint lists to Power Pages tables, organizations can streamline workflows and enhance data-driven insights. Below are step-by-step instructions on how to achieve this synchronization effortlessly.
This is my SharePoint library which I’m going to sync it to Power Pages

- Go to Power Pages and select "Table" in the Data section.

- Opt for "New table from external data".

- If a Sharepoint connection exists, choose it; otherwise, create a new connection and proceed.

- Input the SharePoint List URL for data retrieval, then click "Next".


- Select the desired list from the available options on the site.

- Provide a display name and proceed by clicking "Next".

- Complete the setup by clicking "Finish".

- Once done, the selected list will be visible in the Data section.

- All items from the list will populate in Power Pages table.
- Additionally, you can add new items or update existing ones, and these changes will be automatically synced.


Conclusion
Efficient data management is crucial for organizations aiming to stay competitive in today's dynamic business landscape. By syncing SharePoint list data to Power Pages tables, organizations can harness the power of their data seamlessly. This synchronization process enables users to access, analyze, and update SharePoint data within the familiar interface of Power Pages, thereby enhancing productivity and facilitating informed decision-making. With these steps, organizations can unlock the full potential of their data assets, driving innovation and growth.

Step-by-Step Guide: Syncing SharePoint List to Power Pages Table
In the modern era of data management and analysis, seamless integration between platforms is paramount. SharePoint, a widely used collaboration tool,

Prerequisites
- Access to Power Automate
- Published Dataset
- Power BI Desktop
Power BI and Power Automate have emerged as powerful tools to harness the potential of data. In this blog post, we'll explore a practical scenario where you can seamlessly send notifications based on Power BI data using Power Automate. Specifically, we'll walk through the process of sending notifications to users who haven't logged their work hours, demonstrating the efficiency and ease of integrating these Microsoft Power Platform tools.
Example: Work Hours Tracking Notification
This example demonstrates how to send an email notification to users who haven't logged their worked hours:
Steps 1: Power BI Desktop
To start the process, open the report in Power BI Desktop and follow these steps:
- Create a new tab: Add a "Power Automate" tab or any descriptive name.
- Add Visual: Add a table Visual from the visualization pane
- Apply filters: Select "Visualizations"> "Filters" and create a filter where "Logged Hours" equals 0.

- Performance Analysis: Navigate to the Optimize tab and select Performance Analyzer. Start recording, then click Refresh Visual to capture and analyze the query.


- Copy Query: Once the performance analysis is complete, copy the generated query. This will be crucial for the subsequent steps in Power Automate.
Step 2: Power Automate Integration
Now, let's seamlessly integrate Power BI data with Power Automate to automate notifications:
- Create a flow: Click "Create" > "Scheduled Cloud Flow".
- Set the frequency: Choose the desired interval for checking (e.g., daily, hourly).
- Add a trigger: Search for "Power BI" > "Run a query against a dataset."
- Select the workspace and then choose the dataset from the dropdown menu.

- Input Query Text: Paste the previously copied query from Power BI Desktop into the Query Text field. This ensures that Power Automate retrieves the specific dataset based on your defined criteria.
- Parse the retrieved data.
- Condition Check (Optional): Set up any additional condition to check if needed.

- Send Notification: Add Send an email action to send a notification.
Schedule Your Expert Session
Are you on the lookout for top-tier Power BI consultancy or specialized Power Automate consulting services to enhance your business's data management and automation strategies? Look no further! Our team of seasoned experts is here to guide you through the complexities of data visualization and process automation, ensuring your business leverages the full spectrum of capabilities offered by Power BI and Power Automate.
Don't miss this opportunity to transform your data strategy and automation processes. Connect with us. Schedule your consultation today with our experts. Our dedicated support will help you navigate the evolving digital landscape, ensuring your business remains ahead of the curve. Let's work together to turn your data into your most powerful asset and optimize your workflows for maximum efficiency.

How to run a query against a dataset in power automate?
Power BI and Power Automate have emerged as powerful tools to harness the potential of data. In this blog post, we'll explore a practical scenario where you can seamlessly send notifications based on Power BI data using Power Automate.

What is data refresh in Power BI?
Power BI serves as a crucial bridge connecting raw data to analytical tools, emphasizing the importance of maintaining current datasets for accuracy. Without regular updates, data becomes outdated, leading to unreliable analytics and misguided decisions. Refreshing your data in Power BI ensures you're working with the most recent information, allowing for effective tracking of data shifts, trends, and patterns. This process not only aids in making informed decisions but also in fine-tuning strategies based on evolving data insights.
Furthermore, refreshing data in Power BI can uncover discrepancies or errors, such as issues with the data source or its linkage to Power BI, indicating potential updating failures. Addressing these discrepancies is essential for guaranteeing the precision and trustworthiness of your data analysis.
Prerequisites
- Access to Power BI service
- Access to Power Automate
- A published Power BI dataset
To ensure your Power BI reports always reflect the latest trends, automating dataset refresh is crucial. This blog explores two effective methods: Scheduled refresh and Power Automate.
Method 1: Scheduled Refresh - Simple and Straightforward
- Navigate to your Dataset: In the Power BI Service, locate the dataset you want to automate.
- Access Settings: Click on the ellipsis (...) next to the dataset name and select "Settings."

- Schedule the Refresh: Under "Semantic Model," find the "Scheduled refresh" section. Click "Enable" and choose your desired refresh schedule. Options include hourly, daily, weekly, or monthly intervals.

- Save and Relax: Click "Apply" to activate the schedule. Power BI will automatically fetch new data based on your chosen frequency.
Method 2: Power Automate - Advanced Automation
- Create a Flow in Power Automate: Click here Power Automate and sign in. Click "Create" and choose a flow template (e.g., "Instant Cloud Flow" or “Scheduled Cloud flow”).

- Connect to Power BI: Search for the "Power BI - Refresh a Dataset" action and add it to your flow.
- Select Dataset: Choose the dataset you want to refresh.

- Save and Test: Click "Save" and run a test to ensure the flow functions correctly.
For additional expert guidance or services, don't hesitate to reach out for our Power BI consulting services. Our team of skilled Power BI consultants is ready to assist you in leveraging the full potential of your data analytics and reporting needs.
How to Refresh Power BI Dataset Automatically in 2024
Power BI serves as a crucial bridge connecting raw data to analytical tools, emphasizing the importance of maintaining current datasets for accuracy.
In every business, managing documents and collaborating on files is essential. Microsoft SharePoint offers robust features to support these needs, with the Document Library being a key component. By managing your SharePoint Document Library effectively, you can significantly enhance your document handling experience.
Understanding and Creating a Document Library in SharePoint
A SharePoint document library provides a secure and easily accessible place for you and your team to store, collaborate on, and access documents from any device. For example, you might use a document library on a SharePoint site to consolidate all files related to a specific project or client. Adding files to the library or moving data between folders is as simple as dragging and dropping.
Step-by-Step guide for document library creation
Creating a document library in SharePoint is a straightforward process that can greatly enhance your organization's document management capabilities. Here’s a step-by-step guide to get you started:
Step 1: Log in to Your SharePoint Site
- Access your SharePoint site by logging in with your credentials.
- Ensure you have the necessary permissions to create a document library.
Step 2: Navigate to Site Contents
- Once logged in, Select ‘Site Contents’ on the top right-hand side.
Step 3: Create a New Document Library
- In the Site Contents page, click on ‘+ New’ and then select ‘Document library’ from the options.
- This action will prompt you to create a new document library.


- Select ‘Blank document’ and proceed.
Step 4: Configure Your Document Library

- Enter a name for your document library. Choose a name that clearly represents the type of documents it will contain.
- Optionally, you can provide a description for the library to give more context to its users.
- Decide whether to display this library on the site navigation.

Step 5: Add Documents to Your Library
- Navigate back to your document library.
- You can upload documents by clicking on ‘Upload’ and selecting the files from your computer.
- Alternatively, you can drag and drop files directly into the library.

Step 6: Organize and Manage Documents
- Use the features of the document library to organize your files. Create folders or use metadata columns to categorize your documents.
- Set up views to display your documents in the most useful way for your team.
Step 7: Share and Collaborate
- Share your document library or individual documents with team members.
- Utilize SharePoint’s collaboration features like co-authoring and comments to collaborate on documents.
Step 8: Access and Use Your Document Library
- Access your document library anytime from the SharePoint site.
- Use the library to store, share, and manage your documents effectively.
Conclusion
In our guide on establishing a well-structured document library in SharePoint, we've gone beyond mere file storage. We provide a roadmap for equipping your team with a dynamic platform that enhances both collaboration and data management. Our comprehensive blog post, "How to Create a Document Library in SharePoint," offers insights into elevating your document management strategies, pushing your organization towards heightened efficiency, clarity, and achievement.
By following these steps, you can set up a well-organized, easy-to-use document library that enhances your team’s productivity and collaboration. Creating a document library in SharePoint can significantly improve how your team stores and accesses important documents. Remember to take advantage of SharePoint’s robust features to get the most out of your document library.
As the digital world evolves, embracing new methodologies becomes crucial. With SharePoint Designs, you're at the forefront of a robust SharePoint environment, driving productivity amidst the ever-evolving dynamics of contemporary business. Should you need additional technical support, please don't hesitate to contact us at sales@sharepointdesigns.com

How to Create a Document Library in SharePoint – A Step-by-Step Guide
In every business, managing documents and collaborating on files is essential. Microsoft SharePoint offers robust features to support these needs,
What is List?
In SharePoint, a list is essentially a structured set of data, serving as a dynamic platform for you and your colleagues to systematically arrange and access various types of information. You can think of it as like a spread sheet, but with more advanced and integrated features. SharePoint lists allow you to store, share, and manage data – these can be contacts, calendar appointments, tasks, or any other type of information. Lists in SharePoint come with the added benefits of being customizable, supporting various data types (like text, choice, date), and being able to integrate with other Microsoft services, such as PowerApps and Power Automate, for enhanced functionality. They are essential tools for collaboration and data management within the SharePoint environment.
How to create a list in SharePoint?
1. Sign into your SharePoint Site:
- Navigate to your SharePoint site and log in with your credentials.
2. Create site using the create site option

- Select the site type.

- Select a template

- Click Use Template to apply.
- Give a unique name to the site and unique site address will be created and then click Next!

- Select language you want and select create site.
- Then your site will be created and look like this!

3. Create a New List:
- Click on + New, and then select List from the dropdown menu.

- Select the Blank list Or Whatever you want. Here I go with Blank list.

4. Set Up Your List:
- Enter a name for your list.
- Optionally, you can add a description.
- Choose whether to show this list in site navigation.

5. Customize the List:
- Once the list is created, you can add columns by clicking on Add column.
- Choose the type of column (e.g., text, number, date).
- Provide a name for the column and set any additional settings as required.

6. Enter Data into Your List:
- Click on New to add items to your list.
- Fill in the fields for each new item you add.
- Click Save and your data will be added to your list.

- You can also edit your list using Grid view and if it’s not needed you can exit.

7. To change List name
- Click on the list name.
- Go to Column Setting and Select rename
- Rename your list name whenever you need!

8. Save and Share Your List:
- After adding your items, click Save.
- You can share your list with others by clicking on the Share button.
- If you want to export the list and you can dousing Export

9. Customize Views (Optional):
- You can create custom views to filter, sort, and display your data in different ways.
10. Integration:
- You can integrate your list with Power Apps and Power Automate integration if needed.

Final thoughts!
SharePoint lists are a key component in organizing and tracking critical information, making them a cornerstone of effective SharePoint consulting services. These lists integrate seamlessly with Microsoft PowerApps, Power Automate, and Microsoft Teams, amplifying their functionality. For professionals on the go, SharePoint's mobile applications for iOS and Android ensure you can manage your lists from anywhere. Mastering the creation of SharePoint lists is a simple yet impactful skill.
If you encounter any queries or need guidance on SharePoint lists, our SharePoint consultants at SharePoint Designs are ready to assist. Schedule a free consultation, feel free to reach out to us at sales@sharepointdesigns.com

How to create SharePoint list - A step-by-step Guide
In SharePoint, a list is essentially a structured set of data, serving as a dynamic platform for you
Are you ready to revolutionize your organization’s document management? SharePoint Document Library is the key to unlocking unparalleled efficiency and collaboration capabilities. In this blog post, you will learn how to maximize productivity with essential SharePoint Document Library tactics, from organizing your library to enhancing collaboration with co-authoring and version control.
Key Takeaways
- SharePoint Document Libraries offer enhanced organization, collaboration and integration capabilities for improved document management.
- Leverage metadata fields, content types and logical folder structures to maximize productivity in a SharePoint Document Library.
- Establish secure sharing practices to ensure the integrity of documents stored in a centralized document center.
- Utilize SharePoint Syntex for advanced content understanding and automation. SharePoint Syntex uses advanced AI and machine teaching to amplify human expertise, automate content processing, and transform content into knowledge. It delivers innovative experiences for understanding content, enabling teams to capture, use, and reuse expertise.
Understanding SharePoint Document Libraries

SharePoint Document Libraries, powered by SharePoint Server, are engineered to optimize employees’ time and effort by streamlining the management, storage, and prompt access of documents within a site collection. Compared to a different document library filled with file cabinets and physical folders, a modern SharePoint Document Library provides a secure, centralized repository that allows employees to store, edit, and access documents from any device.
Documents in SharePoint Document Library can be organized using the following methods:
- Folders
- Lists
- Document sets
- Meta tags
Best practices suggest keeping the document volume under 10,000 and having a robust SharePoint document management plan.
Defining a Document Library
A SharePoint Document Library is a centralized repository for the storage and management of documents, which supports various types of documents, including spreadsheets, images, and audio files, and enables users to share these documents with other users on the SharePoint site. Metadata and version control are provided in a single document library, allowing for efficient organization and management of documents.
A SharePoint Document Library is structured using metadata to facilitate document retrieval, with a focus on centralizing and reusing content whenever possible, such as in a document center site. This approach to document library organization ensures efficient management of SharePoint documents.
Document Libraries vs. Folders
While folders are used for categorizing files within a Document Library, Document Libraries offer a more extensive framework for administering documents and folders. The primary benefits of utilizing Document Libraries instead of Folders in SharePoint include:
- Efficient organization with metadata fields
- Seamless collaboration
- Granular access control
- Advanced features such as workflows and version history, which help manage documents effectively.
It is recommended to use a flat folder structure with one layer of broad-category folders within a broader-category document library, allowing for efficient organization and documents management in one document library. Content types, on the other hand, are a classification of documents that use metadata such as department name, file type, modified by, date of creation, etc., to provide more specific information.
Document Libraries vs. Lists
Lists store data in tabular format, while Document Libraries manage files, documents, document sets, or folders. A SharePoint Document Library offers functions such as storing and organizing files, collaboration, offline syncing, metadata, and integration with other tools.
In contrast, a SharePoint List offers the following functions:
- Storing and organizing data
- Allowing users to add, edit, and delete items
- Sorting and filtering data
- Creating custom views
- Automating processes with workflows
- Creating calculated columns and formulas
- Collaborating and sharing lists
- Integrating with other SharePoint features and applications.
To leverage Document Libraries and Lists together in SharePoint, users can utilize dynamic filtering and combined views, promoting collaboration and organization, and optimizing productivity.
Organizing Your SharePoint Document Library

For effective document management in your SharePoint Document Library, implementing a logical folder structure, leveraging metadata for organization, and utilizing content types are key. By organizing content within SharePoint Document Libraries using these methods, you can ensure that your library is easy to navigate and aligns with your organization’s needs, allowing users to easily find and access documents.
Creating a Logical Folder Structure
A logical folder structure in SharePoint Document Library refers to the organization and arrangement of folders within the library that facilitates navigation and document retrieval. It involves creating a hierarchical structure of folders that aligns with the organization’s needs and structure, allowing for effective categorization and retrieval of documents.
To create a logical folder structure in a SharePoint Document Library, navigate to the SharePoint site, open the Document Library where you wish to create the folders, click the “+ New” button, select “Folder” from the dropdown menu, enter a name for the folder, and click “Create”. When structuring folders, it’s recommended to keep the folder structure flat, use brief and descriptive folder names, avoid nesting subfolders more than three levels deep, avoid spaces or special characters in folder names, and utilize meta tags or data columns for document tagging.
A well-structured folder system can:
- Boost navigation and organization
- Promote collaboration
- Ascertain that files are stored in the appropriate location
- Simplify the process for team members to locate and collaborate on shared documents.
Leveraging Metadata for Organization

Metadata improves the searchability of documents in SharePoint Document Libraries by providing additional information about the documents, enabling users to search for documents based on certain attributes or tags associated with the metadata. Users can leverage each metadata column to facilitate navigation and file discovery, thus enabling them to find documents based on specific criteria, such as client, department, or date.
Incorporating metadata into SharePoint Document Libraries can lead to enhanced document management productivity.
Implementing Content Types
Content types provide information related to individual items in SharePoint Document Libraries, helping to establish filters in views and optimize organization and productivity. Content types can be accessed in SharePoint Document Library by configuring metadata navigation settings, adding columns from existing site columns, and switching the default experience.
Utilizing content types across sites, lists, and libraries in your collection can lead to a more organized and efficient SharePoint Document Library.
Permissions and Security in SharePoint Document Libraries
Maintaining the integrity of your documents and preventing unauthorized access requires ensuring security and proper access control in your SharePoint Document Library. Configuring permission levels, implementing item-level security, and practicing secure sharing are all essential components of a secure SharePoint Document Library.
Configuring Permission Levels
To modify a user’s permission level in a SharePoint Document Library, follow these steps:
- Access the Document Library.
- Select the ‘Settings’ (gear icon).
- Choose ‘Library settings’.
- In the ‘Permissions and Management’ section, select ‘Permissions for this document library’.
- Locate the user whose permission level is to be adjusted.
- Select the user.
- Click on ‘Edit User Permissions’.
- Choose the desired permission level.
- Select ‘Save’ to apply the changes.
Configuring permission levels allows you to restrict user access and uphold security in your SharePoint Document Library.
Item-Level Security
Item-level security in SharePoint Document Libraries enables users to set permissions on individual items within the library, providing a more granular level of security and control. This allows users to have different levels of access, edit, or view specific items within the library.
To implement item-level security in SharePoint Document Libraries, follow these steps:
- Navigate to the List Settings.
- Select Advanced Settings.
- Scroll down to the Item Level Permissions section.
- Enable the option for Item-level permissions.
- Assign the specific permissions for each item in the library.
By implementing item-level security, you can ensure that sensitive or confidential documents are only accessible to authorized individuals.
Enabling item-level permissions allows for managing access to individual items within the document library based on user roles and permissions.
Secure Sharing Practices
Practicing secure sharing is essential for maintaining the integrity of your documents and preventing unauthorized access. To grant appropriate permissions for secure sharing in SharePoint Document Libraries, follow these steps:
- Right-click on the file that requires permission.
- Select ‘Manage access’ from the context menu.
- Enter the email addresses or group names of the users or groups that require access.
- Select the appropriate permission level for each user or group.
- Click ‘Share’ to grant the permissions and securely share the document.
Following these steps ensures that your documents are shared securely and exclusively with the appropriate users.
Enhancing Collaboration with Co-Authoring and Version Control

Co-authoring and version control, integral features in SharePoint Document Libraries, allow multiple users to work on documents simultaneously while maintaining a comprehensive history of document changes. By implementing co-authoring, version control, and the check-out system, you can enhance collaboration and maintain control over document editing in your SharePoint Document Library.
Co-Authoring Capabilities
SharePoint Document Library provides co-authoring capabilities that enable multiple users to access the same document concurrently, enhancing collaboration, and increasing productivity. Utilizing co-authoring in SharePoint Document Libraries offers benefits such as:
- Heightened productivity
- Version control
- Improved communication
- Flexibility and accessibility
However, one should note that the advisable maximum number of concurrent editors for co-authoring a document in SharePoint is 10, with a boundary of 99, but there is no definitive limit to the number of users who can co-author a document.
Managing Document Versions
Versioning in SharePoint Document Library enables the storage and tracking of multiple versions of a document, allowing users to monitor changes made to a document, view previous versions, and restore or compare different versions if necessary. To enable versioning in a SharePoint Document Library, one can navigate to the Library Settings or List Settings and select the Versioning settings, which will allow for the enabling of versioning and the setting of versioning limits.
Utilizing document versioning enables users to locate the appropriate files swiftly, refine their search results, and navigate through the document library more effectively.
Check-Out System
The Check-Out system in SharePoint Document Library enables users to reserve a file for exclusive editing, preventing other users from accessing the file while someone is already editing it. The Check-Out system facilitates the prevention of conflicts and the maintenance of control over document editing by allowing users to ‘check out’ a document prior to making any changes, ensuring that only one person can make alterations at any given time. However, there are limitations to the Check-Out system, such as the maximum number of items that can be checked out, the total storage limit across all synced devices, and the length of URLs and file paths.
Streamlining Processes with SharePoint Document Library Automation
Automation in SharePoint Document Libraries allows for more efficient document management through features such as workflows, Power Automate integration, and alerts and notifications. By streamlining processes, SharePoint workflows save time, increase efficiency, and reduce the risk of human error, ultimately enhancing the overall document management experience.
Setting Up Automated Workflows
Automated workflows are processes that are activated upon certain conditions or events and can be utilized to optimize and automate common business processes, such as project approval or document review.
To set up automated workflows in a SharePoint Document Library, follow these steps:
- Open Power Automate.
- Navigate to the SharePoint site where you want to create the workflow.
- Click on ‘Create’.
- Select ‘Automated flow’ or ‘Instant flow’ depending on your requirements.
- Choose the trigger that will start the workflow.
- Add actions to the workflow.
- Configure the actions by providing the necessary inputs and parameters.
- Customize the workflow logic.
- Test the workflow.
- Save and publish the workflow.
Power Automate Integration
Power Automate is a workflow automation tool that enables you to create automated processes and workflows in SharePoint Document Libraries, facilitating processes by automating repetitive tasks, such as creating document libraries, initiating approval flows when new files are added, retrieving files from libraries, and more.
Utilizing Power Automate can save time and enhance productivity by automating manual processes in SharePoint Document Libraries.
Alerts and Notifications
Alerts and notifications in SharePoint Document Libraries enable users to receive updates and notifications regarding changes and activities occurring in a SharePoint Document Library, allowing users to configure alerts to be notified when new documents are added, documents are modified, or when specific criteria are met. These alerts can be established at the library level or at the individual document level, ensuring users stay informed about document changes and updates.
Advanced Features and Customization of SharePoint Document Libraries
SharePoint Document Libraries feature advanced options and customization opportunities that can boost user experience and productivity. By incorporating the following customizations, you can create a tailored and efficient Document Library that meets your organization’s specific needs and preferences:
- Custom views
- Filters
- Library settings
- Web parts
Custom Views and Filters
Custom views provide the ability to alter the sort order of documents and folders, display or conceal particular columns, or filter the information in specific ways, allowing users to quickly and easily locate and access specific content based on certain criteria.
Utilizing custom views and filters allows users to enhance navigation and productivity within the document library.
Library Settings and Configuration
Properly configuring library settings in SharePoint Document Libraries is essential for ensuring that your library operates efficiently and meets your organization’s needs. Best practices for configuring a SharePoint Document Library include:
- Determining the library type based on specific needs
- Capturing organizational knowledge and best practices in the library
- Planning for content governance
- Setting appropriate permissions for the document library to ensure proper access control
Adding and Using Web Parts
Web Parts in SharePoint Document Library are components that can be integrated into a SharePoint page to display and interact with documents and files stored in a document library. Users can leverage web parts to create new folders and documents, upload files and folders, and carry out various operations related to document management.
Incorporating web parts into your SharePoint Document Library can enhance functionality and elevate user experience.
Optimizing File Management and Access
Efficient file management and access in your SharePoint Document Library can be realized through features such as bulk upload, OneDrive synchronization, and thumbnail views. By implementing these features, you can optimize your document library for easier file identification, navigation, and collaboration.
Bulk Upload and Drag-and-Drop Features
The bulk upload and drag-and-drop features in SharePoint Document Library enable users to upload multiple files simultaneously, streamlining the process of adding files to the library and increasing productivity. To utilize these features, navigate to the SharePoint site, open the Document Library, click the “+ New” button, select “Folder” from the dropdown menu, enter a name for the folder, and click “Create”.
Remember that the file size limits for bulk upload and drag-and-drop in SharePoint Document Library are a maximum of 100 GB total file size, no more than 30,000 files, and each file should not exceed 15 GB.
Synchronizing Files with OneDrive
Synchronizing files with OneDrive provides the following benefits:
- Seamless access to SharePoint files without the need to log into SharePoint Online
- The ability to work on SharePoint files offline and synchronize changes when connected to the internet
- Improved productivity and connectivity
- Extended storage space
- Tracking file activity and version history
Integrating OneDrive with your SharePoint Document Library can boost collaboration, enhance file management, and ensure your documents are always updated and accessible.
Thumbnail View and Previews

Thumbnail view and previews in SharePoint Document Library enable users to view a visual preview of their files, providing rapid visual recognition and efficient browsing. However, there are limitations to using thumbnail view and previews in SharePoint Document Library, such as SharePoint Online Picture Library may not display thumbnail previews, and loading image thumbnails in SharePoint libraries may be slow when using Windows Explorer with WebDAV technology.
Establishing a Single Source of Truth
A single source of truth is crucial for efficient document management. It ensures that end users can locate documents when needed and maintains a consistent and accurate record of document changes. By centralizing documents in a SharePoint Document Center, addressing challenges, and implementing solutions, you can establish a single source of truth for your organization and optimize your document management processes.
Benefits of a Centralized Document Center
A centralized Document Center in SharePoint offers numerous benefits, such as:
- Centralized storage and management
- Automation of document processes
- Simplified access and sharing
- Enhanced collaboration and inter-departmental cross-referencing
- Increased efficiency in document management.
Implementing a centralized Document Center in your organization can ensure all users have access to the most current and accurate information, leading to enhanced productivity and collaboration.
Challenges and Solutions
Maintaining a single source of truth in a SharePoint Document Center presents challenges such as:
- Ensuring a single source of truth is maintained
- Controlling certain areas
- Guiding users to enter the correct data
- Addressing poor document management practices
Configuring permission levels, implementing item-level security, and practicing secure sharing can help address these challenges and ensure that your SharePoint Document Center remains a reliable and accurate information source for your organization.
Summary
In conclusion, SharePoint Document Library offers a powerful solution for organizations to optimize their document management processes. By implementing the essential tactics discussed in this blog post, such as organizing your library, enhancing collaboration with co-authoring and version control, streamlining processes with automation, customizing your library with advanced features, and establishing a single source of truth, you can revolutionize your organization’s document management and unlock unparalleled efficiency and collaboration. It’s time to harness the full potential of SharePoint Document Library and take your organization’s productivity to new heights.

Maximizing Productivity with SharePoint Document Library: Essential Tactics
SharePoint Document Library is the key to unlocking unparalleled efficiency and collaboration capabilities.

Once you've created a report in Power BI, you can easily share it with others by embedding it into a SharePoint site page. This allows your colleagues and collaborators to view your report with out having to access Power BI directly.
Prerequisites
- A Power BI report published to the Power BI service.
- A SharePoint site with access permissions.
- Power BI web part installed on the SharePoint site.
Steps to Embed a Power BI Report into a SharePoint Site Page
1. Open the SharePoint site page where you want to embed the report.
2. Click the Edit button in the top right corner of the page.
3. Click the + New button in the top left corner of the page.
4. Search for and select the Power BI web part.

5. Click the Add report button.
6. Copy the embed URL of the Power BI report you want to embed. You can find the embed URL by opening the report in Power BI, clicking the File tab, and then selecting Embed in SharePoint Online.

7. Paste the embed URL into the Power BI report link field in the web part properties pane.
8. Select the Show Filter Pane and Show Navigation Pane checkboxes if you want these features to be visible in the embedded report.

9. Click the Publish button to publish the SharePoint page and make the embedded report visible to others.
Explore our previous blog, The Ultimate Step-by-Step Guide to Power BI Report Creation for a detailed walk through on crafting reports in Power BI. Dive into the steps for expert insights. Connect with our Power BI Consultants for expert guidance on embedding reports in SharePoint. For more insights like this, join our weekly newsletters and follow our blog updates.

Easy 9 Steps Guide to Embed Power BI Report in SharePoint
Once you've created a report in Power BI, you can easily share it with others by embedding it into a SharePoint site page.
Navigating Microsoft Copilot: A Guide to Its Products
Microsoft’s AI offerings, such as Bing Chat and Microsoft 365 Copilot (including GitHub Copilot), are paving the way for a more productive future. These intelligent tools simplify tasks through features like conversational bots and custom searches tailored to your needs. Let’s explore how you can use Microsoft Copilots to optimize your workflow today.
The Pioneers of AI Productivity
Microsoft integrates AI across its products, making them user-friendly and intuitive.
- Bing Chat leverages large language models within Microsoft Edge.
- Integration with Microsoft Graph ensures seamless connection between apps and services.
Available Across:
- Bing
- Edge
- Microsoft 365
- Windows (Windows Copilot)
Microsoft recently launched a Copilot, offering a unified AI productivity experience in Windows 11, allowing users to manage tasks and settings through a centralized assistant.
1. Best for Integrated OS Experience - Microsoft Copilot
Microsoft Copilot in Windows 11 offers:
- AI-powered assistance integrated into Windows 11
- App launching and system setting adjustments (volume, dark mode) via voice command
- Bing Chat Enterprise integration for combining web and work data
IT admins can deploy Copilot with access control, ensuring security and personalization.
2. Best for Conversational AI - Bing Chat
Microsoft Edge + Bing Chat:
- Ideal for remote work and flexible workflows
- Powered by Open AI’s GPT-4 for deep understanding
- DALLE 3 generates activity-specific images
- Free and always available at bing.com/chat
Microsoft continues improving Bing Chat to reduce hallucinations and enhance reliability.
3. Best for Office Productivity - Microsoft 365 Copilot
Microsoft 365 Copilot boosts productivity in Teams, Word, Outlook, Excel, and PowerPoint:
- Generate text and tables in Word
- Summarize and draft emails in Outlook
- Create Python visualizations in Excel
- Access insights in OneDrive without opening files
Enterprise Plan: $30/user/month – offering:
- Intelligent writing assistance
- Advanced data analysis and visualization
- Personalized productivity insights
- Automated email management
- Voice dictation and transcription
Integration ensures a streamlined experience across Microsoft 365 apps for everyday efficiency.
4. Best for Modern Computing - Windows 11
Windows 11 offers:
- Modern UI with upgraded Start menu and Taskbar
- Microsoft Copilot for AI assistance in system settings
- Gaming features: Game Bar, Direct Storage, Auto HDR, Game Mode, Game widget store, Xbox app
Access to Android apps via Windows Subsystem for Android and Amazon Appstore
5. Best for Developers - GitHub Copilot
GitHub Copilot helps developers:
- Get real-time code suggestions
- Work with multiple programming languages
- Reduce errors and accelerate workflows
Supported languages:
- JavaScript, Python, C#, C++, Java, PHP, Ruby, Go
- Pricing: $10/month or $100/year.
Powered by OpenAI Codex, Copilot translates comments or code lines into natural language.
Choosing Your AI Copilot
- Microsoft Copilot: For unified AI in Windows 11
- Bing Chat: For advanced conversational AI
- Microsoft 365 Copilot: For office productivity and automation
Select the copilot that fits your specific workflow needs.
Summary
To sum up, Microsoft’s AI copilots can provide the perfect solution for any need. Ranging from workplace efficiency to coding and regular computing. By understanding how these tools differ, you can decide which works best in accordance with your requirements and take advantage of all the features that this technology has to offer.
Welcome to a new era with an AI-driven productivity upgrade due to its empowering capabilities. Take full control over every aspect of your job thanks to artificial intelligence - don’t miss out on such groundbreaking opportunities!
Ready to harness AI in your workflow?
Contact us for Microsoft Copilot Consulting Services and elevate your productivity. Embrace AI-driven solutions tailored for your needs get in touch now!

Navigating Microsoft Copilot: A Guide to Its Products
Microsoft’s AI offerings, such as Bing Chat and Microsoft 365 Copilot (also known as GitHub Copilot), are paving the way for a more productive future.
Power BI is a business intelligence (BI) tool that allows you to connect to your data, create visualizations, and share insights with others.
Prerequisites
- Power BI Desktop installed on your computer.
- A dataset that you want to connect to. (Here we will use SharePoint List)
Step 1: Connect to Your Data
The first step in creating a report is to connect to your data. Power BI can connect to a variety of data sources, including Excel spreadsheets, CSV files, SQL databases, and cloud services like OneDrive and many more.
To connect to your data,
- Open Power BI Desktop and click on the Get Data button.
- Click more and select Online Services -> SharePoint Online List.

- Follow the prompts to connect.
Step 2: Create Visualizations
Once you have connected to your data, you can start creating visualizations. Power BI offers a wide variety of visualizations, including charts, graphs, maps, and pie charts.
To create a visualization, Click a visual from the Visualizations pane. Power BI will automatically create a visualization based on the visual that you selected.

To Add Data into to visual:
- Under Data Pane, Expand the Data Source (Timesheet)
- Drag and drop the fields into the visual as per your need.

Step 3: Add Filters and Slicers
Filters and slicers allow you to narrow down your data and see specific results. To add a filter, click on the Add Filter button in the Filters pane. To add a slicer, click on the Add Slicer button in the Visualizations pane.


Now you can also use slicer as a filter to play around with the table.
Similarly, you can also use slicer as a filter for the other columns available in your Data Source.
Step 4: Format Your Report
Once you have added your visualizations, filters, and slicers, you can format your report to make it look its best. You can change the font, colors, and layout of your report.
To format your report, click on the Format tab in the Visualizations pane. You can then make changes to the appearance of your report.

Step 5: Final Output

Step 6: Share Your Report
Once you are satisfied with your report, you can share it with others. Power Business Intelligence offers a variety of ways to share your report, including exporting it to a PDF file, publishing it to a webpage, or sending it via email.
- To share your report, click on the File tab in the top menu bar and select Share. Choose the sharing method that you want to use.
- To Publish your report, click Publish on the Top right and select the destination to publish your report.
Explore our blog, 'Easy 9 Steps Guide to Embed Power BI Report in SharePoint' for a comprehensive step-by-step guide on seamlessly integrating Power BI reports into SharePoint.
Join our weekly newsletters and regular blog updates for the latest insights and tips. Connect with our expert Business Intelligence Consultants for Power BI Services. Elevate your data strategy and make informed decisions. Contact us now to transform your analytics!

The Ultimate Step-by-Step Guide to Power BI Report Creation
Power BI is a business intelligence (BI) tool that allows you to connect to your data, create visualizations, and share insights with others.
In today's rapidly evolving digital landscape, the way we work and collaborate is undergoing a significant transformation. At the forefront of this change is SharePoint Premium, a powerful tool reshaping the dynamics of business operations. As highlighted in the 2023 Work Trend Index, the integration of AI and digital tools in the workplace is not just a trend but a necessity. SharePoint Premium stands out as a pivotal platform in this journey, offering robust solutions for enhanced collaboration, streamlined processes, and informed decision-making.
Enhancing Team Collaboration
The core strength of SharePoint Premium lies in its ability to facilitate seamless collaboration across diverse teams and departments. With advanced document management capabilities and seamless integration with Microsoft Teams, SharePoint Premium breaks down silos and fosters a collaborative environment. This integration is crucial in today's context, as the 2023 Work Trend Index reveals a threefold increase in Microsoft Teams meetings and calls since 2020. SharePoint Premium ensures that collaborative efforts are more efficient and productive, irrespective of geographical boundaries.
Streamlining Business Processes
In an era where 70% of people would prefer to delegate work to AI to lessen their workloads, SharePoint Premium emerges as a key player in automating routine tasks. Its integration with Power Automate allows businesses to create custom workflows, reducing manual effort and increasing efficiency. Additionally, PowerApps enables businesses to develop custom applications tailored to their unique needs, further enhancing operational efficiency and user experience.
Data-Driven Decision Making
Data is the new currency in the business world, and SharePoint Premium provides an effective platform for consolidating, managing, and visualizing data. This capability is crucial for data-driven decision-making, aligning with the AI advancements highlighted in Microsoft Ignite 2023. SharePoint Premium's integration with various AI tools enables businesses to analyze trends, generate actionable insights, and make informed decisions swiftly.
Ensuring Security and Compliance
In the current era of AI and digital transformation, data security and compliance are more critical than ever. SharePoint Premium addresses these concerns with robust security features and compliance tools, ensuring that business data is protected and regulatory requirements are met. This aspect is particularly vital for IT managers and CTOs, who are responsible for safeguarding their organization's data integrity.
SharePoint in the Future of Work
As we look to the future, SharePoint Premium aligns perfectly with the emerging trends in AI and digital transformation. The platform is continuously evolving, integrating new AI capabilities to reshape how work is done, as indicated in Microsoft Ignite 2023. SharePoint Premium is not just a tool for today but a strategic investment for the future, empowering businesses to stay ahead in a rapidly changing digital world.
Conclusion
SharePoint Premium offers a suite of features that are essential for modern businesses, especially in the realms of collaboration, process optimization, and decision-making. For IT managers, directors, CTOs, and COOs, embracing SharePoint Premium is a strategic step towards successful digital transformation. The platform's alignment with current and future AI advancements makes it an indispensable tool for businesses aiming to thrive in the digital era.

Revolutionizing Business Collaboration with SharePoint Premium: Key Use Cases for Decision-Makers
In today's rapidly evolving digital landscape, the way we work and collaborate is undergoing a significant transformation.
In the digital age, the way businesses operate is constantly evolving. Two key players in this evolution are Power Apps and Artificial Intelligence (AI). Together, they're reshaping the future of business applications.
Power Apps: A Game-Changer in App Development
Power Apps, part of Microsoft's Power Platform, is a low-code development platform. It empowers everyone, from professional developers to tech-savvy business users, to create custom business applications. For instance, a retail company can use Power Apps to create a custom inventory management app, streamlining their stock control process. With Power Apps, the tedious, time-consuming coding process is replaced by a user-friendly, drag-and-drop interface. This democratization of app development accelerates digital transformation, making it accessible to all.
The Rise of AI in Business Applications
AI has been a buzzword for some time now. But it's more than just a trend; it's a revolution. AI's ability to learn, reason, and understand makes it a powerful tool in various business applications. For example, a healthcare provider can use AI to analyze patient data and predict health risks. From predictive analytics to customer service, AI is making its mark.
Power Apps and AI: A Powerful Combination
When Power Apps and AI come together, the possibilities are endless. But what exactly is Power Apps AI and how does it work? PowerApps AI refers to the integration of AI capabilities within the Power Apps platform. This integration allows users to leverage AI's capabilities without needing extensive coding knowledge.
Understanding Power Apps AI Builder
So, what is PowerApps AI Builder? AI Builder is a feature integrated with Power Apps that allows users to leverage AI's capabilities without needing extensive coding knowledge. It provides pre-built AI models in Power Apps that can be used directly in your apps, or you can build and train your custom models based on your data.
The Use of AI in Power Apps
What is the use of AI in Power Apps? AI in Power Apps is used to enhance the functionality and efficiency of business applications. For instance, a logistics company can use AI Builder in Power Apps to create a Power App that predicts delivery times based on traffic data. This not only improves the efficiency of delivery processes but also enhances customer satisfaction by providing accurate delivery estimates. This integration brings AI's power to the masses, making it a key player in the future of business applications.
Transforming Business Processes with Power Apps and AI
Power Apps and AI can streamline and automate business processes. For instance, a manufacturing company can use AI to predict equipment failures based on historical data. Power Apps can then use these insights to automate maintenance scheduling. This combination not only boosts efficiency but also enables data-driven decision-making.
Enhancing Customer Experience with Power Apps and AI
In today's customer-centric world, providing a personalized experience is crucial. Power Apps and AI can help businesses achieve this. A telecom company, for instance, can use AI to analyze customer data to gain insights into behavior and preferences. Power Apps can then use these insights to tailor the customer experience, such as recommending personalized data plans, boosting satisfaction and loyalty.
The Future of Power Apps and AI
The future of business applications lies in the convergence of Power Apps and AI. As AI technology advances and Power Apps continues to democratize app development, businesses can expect more sophisticated, personalized, and efficient applications. This fusion of Power Apps and AI is not just the future of business applications; it's the future of business itself.
Conclusion
The integration of Power Apps and AI is revolutionizing the way businesses operate. By democratizing app development and leveraging AI's capabilities, businesses can transform their processes, enhance customer experience, and make data-driven decisions. As we look to the future, the synergy of Power Apps and AI will continue to redefine the landscape of business applications. The future is here, and it's powered by Power Apps and AI.

The Future of Business Applications: Power Apps & AI
In the digital age, the way businesses operate is constantly evolving. Two key players in this evolution are Power Apps and Artificial Intelligence (AI).
What are PowerApps?
Power apps is a low code development platform created to be used by citizen developers. It has an array of apps, connectors, services and data platform that provides an immediate application development environment to build custom apps for your following business requirements. Well, by using power apps, you can immediately create custom apps that connect to your business data that has been stored in the underlying data platforms, which is the standard data service for the apps on-premises or in various data sources.
Creating apps using Microsoft power apps enriches the business with logic and workflow capabilities to transform your business from manual to digital automated procedures. Furthermore, apps developed and power apps users using PowerApps have flexible and seamless designs, which enables you to use them on your mobile devices, tablets or browser. PowerApps helps you work according to your desire; it also makes your user experience feature-rich without writing the code and with proper content management.
Well, when the power apps hit the market, creators assumed it was a basic tool for users with varying tiers of technical expertise. It was mainly an app power platform concentrated on facilitating users to build interactive apps for assorted businesses and their process management or personal strategies. Nevertheless, the platform took off, and the assurance of its success is its proficiency to deal with common challenges that organizations face.
Furthermore, Microsoft PowerApps presented an apps portal as well as model-driven apps. It’s the new canvas app, which in fact enables users to build apps without code being written in standard programming languages, and stay flexible in designing and customizing different designs. These capabilities enable a broad range of apps that contribute more functionality for businesses with Power apps.
Top 10 Use Cases for PowerApps for your Different Development Needs
There are 3 different types of PowerApps solutions that can be used. To access them, go to make.powerapps.com and click on the Apps icon on the left navigation bar. Click on the new app button to select canvas apps, model-driven apps, or websites.

1.Web Portals
Click New app -> Select Website to start creating web portals.

This feature is applicable for creating websites that can be accessed internally and externally, facilitating end users to connect securely with all the data stored in the CDS.
2.Canvas Apps
Click New app -> Select Canvas to start creating canvas apps from blank.

Developers can start building apps by adding workflows to your existing data source and then designing a custom app that delivers more flexibility than model-driven apps. This feature is ideal for business users that want to work from a blank canvas.
3.Model-Driven Apps
Click New app -> Select Model-driven to start creating model driven apps.

This feature is excellent for business processes that require complex logic. With power apps, the designs are effectively governed by the connected data sources and rely on the information you feed in the app. Well, now that you know what Microsoft power apps are and how it enriches your business, let's dive into their top 10 power apps use cases that you can implement in your business/organization.
Top 10 use cases for Microsoft PowerApps
1.Enables you to build Customized Business Apps
If your business comes across a specific challenge or has a notion for an innovative solution that could give you a great edge, you can build a custom app through power apps to tick all these boxes for you.
The most significant advantage of using power apps is that anyone can create a custom app without requiring coding knowledge or technical expertise. Customized power apps enable you to run and operate your business according to your desire. It caters to practical business tools which enhance your company's service or product, broaden the customer base and boost efficiency.
2.Precise Business Planning
Planning holds an important place in any successful business. It's one of the key features which enable you to work on time with all discipline. Power apps are a spectacular choice for you to make your planning more aesthetically pleasing and convenient. Power apps promote rapid development, designing, and customization; thus, you can precisely plan accordingly to your wish!
3.On-Site Inspection
The on-site inspection application enables you to refer to all instances with pictures, site details, and location pins. Whether you are in real estate, insurance, property management, or any other business, this tool is helpful for your work. It will make your work more accessible and inspection superior. The recorded information is reserved in the back end and can be utilized when detailed reporting or analysis is required.
4.Helps With Expenditure Approval
There is no argument that expense approval is a tiresome job involving many processes and submissions. But, by using Microsoft power apps, users can build a mobile application for seamless and effortless expense approval. An employee can assert an expense by submitting a proposal with proper proof. Then, a manager can also reject or approve the request through notifications and the app can be well-integrated with the existing human resources system.
5.Fonts
Building a custom theme for your Power apps is essential. The fonts, colors, icons and styles you use for all types of controls like date-downs, text inputs, etc., define and embed an app's unique look and feel.
6.Seamless Integration With Office 365 Tools
The numerous benefits of Power apps for Office 365 make your overall process very comfortable. From no coding or programming required to complete security, and seamless app development to easy-to-use data connectors and low cost, it caters for everything!
Furthermore, like numerous other Office 365 products, Power apps obtain regular updates with many unique features. Notably, the latest update features an AI Builder that facilitates Power apps to operate Microsoft's Artificial Intelligence technology and Machine Learning to assist you in building and developing advanced and more imaginative apps.

7.Quick Quote Generator
Sharing customized quotes with the consumers has constantly been a hassle as it consumes a lot of time to develop custom-create manual sections and templates and send them to consumers, then follow them until they are in!
But, with Power apps, business users can entirely automate the customized proposals generation process, wherein pre-defined templates immediately generate quotes based on the values documented in the application and automatically sends personalized mail to the customer.
8.Image Processing Tools
Power apps can incorporate camera-enabled devices, so companies can create apps that offer picture-processing functionalities. For example, construction companies, healthcare providers and retail providers can capture photos of their products and other commodities during inspections with a mobile devices camera and the data accumulated from its GPS. A customized examination app stocks some data within SharePoint or the standard data service layer, pretending to be a hosted database.
9.Offline Working Capability
In Power apps, you can search, manipulate consistently, filter, aggregate, and sort, even though the data source doesn't exist. Sources range from in-memory arrays in the app to list and create, using Microsoft lists, data-verse, and SQL databases.
10.Approval
Power apps designer use the approval pattern to allow stakeholders or multiple stakeholders to examine data, decisions, and records all at once or in series. Even though the approval pattern can be beneficial, it's often integrated with other patterns, particularly the audit and inspection pattern. Authorizations can be smoothly carried out with Power Automate authorization workflows, but they can also be executed with the ability you develop into your app.
Benefits of using power apps
1. Hassle-Free Delivery
Undoubtedly, it takes an extended amount of time and multiple cycles to design and build new software. Wherein, power apps accelerate the speed of the same and are way simple to learn for new employees as well!
2. Cost Efficient
Software management and development lifecycle can be one of the intricate and budget-breaking business processes. In addition, Power apps seamlessly integrate and allow real-time collaboration among team members. It also provides you with apps that are more mobile-friendly or even agree with tablet and desktop versions at the same time.
3. Versatile
Power apps are appropriate in remote storage connections, data servers on-site, and cloud-based environments. The connection and the flow of information is effectively constant. Furthermore, security protocols are driven faultlessly to assure data flow is safe between all areas.
4. Total Security
The custom apps users built through Power Apps are exceptionally secure. These applications and workflows bind into the Azure Active Directory and other Microsoft security keys like the Common Data Services (CDS) which caters to a role-based safety model.
You can regulate permissions at the data and application levels, which tells end-users only to see what’s appropriate for them without portraying internal profiles and follows all the company policies. Furthermore, apps created on the Common Data Services (CDS) are also automatically GDPR-compliant.
5. Solve Unique Business Challenges
If your business encounters a specific challenge, has to fulfil a unique need, or has a notion for an imaginative solution that could give you a competitive advantage, you can indeed assemble a custom app through Power apps to tick all the requirements for you.
From, running data analytics, tracking employee expenses, automating communications and integrating AI functionality into your processes, changes can be done easily through Power apps. In addition, as it’s customized, you can contemplate any inefficiencies or extraordinary processes present and make your app totally fit your business.
6. Saves You Money
Well, no doubt that the time you save by using Power apps will depict productivity gain and money saved. Nevertheless, one of the other key advantages of Power apps is the expenditure entry to start with.
Indeed, off-the-shelf software goes on high price range and often has functionality that may not fit an organisation’s desires. Wherein, the custom Power apps are low-code, more cost-effective and significantly they’re quicker to create. In turn, organisations can accomplish their return on investment (ROI) as well, and that too faster.
7. Boosts Business Transformation
Building custom apps can perhaps take months or even years. However, when your organisation is evolving, you ought to take actions quickly and intensify your digital transformation. A Power app, personalized to precisely the way your company works, can be assembled in few days or even less.
While a few organisations won’t be certain where, to begin with, that notion, you don’t have to worry at all. Pick one province of your procedures that isn’t functioning as well as it could be. Break down the duties involved and you’ll usually find one assignment that takes much lengthier time than it should.
Lastly, to know how SharePoint designs enable effortless invoice tracking with the power apps, visit the link for a clear idea. In the coming years, the necessity for apps will persist as businesses look for methods to simplify processes, determine new and unique ways to cut costs and improve employee productivity and efficiency. Furthermore, contact us, and you will indeed love the next new app we create for you!

Frequently Asked Questions
1.What are the 6 major components of power apps?
Answer-
- Gallery
- Screen
- Control
- Card
- Property
- Function
2.Can Power apps work offline?
Answer- Yes, you can definitely run it offline on your PC on a mobile device.
3.How many companies are using Microsoft power apps?
Answer- Approximately 771 companies are using it.
4.What are the 4 components of a power platform?
Answer- Power Automate, Power BI, Power Apps, and Power Virtual Agents.
5.Do you need Office 365 to use Microsoft power apps?
Answer- Yes. You cannot use powerapps without office 365.
Reference Links

Top 10 PowerApps Use Cases to Streamline Your Business
Power apps is a low code development platform created to be used by citizen developers. It has an array of apps, connectors, services

Microsoft Power Automate offers a variety of powerful flows that streamline workflows and enhance productivity. With Power Automate, you can automate repetitive tasks, connect different applications, and create custom flows. Its versatility and ease of use make it the best choice for automating processes. Power Automate Desktop provides numerous examples, showcasing its capabilities, such as data integration, email automation, and document processing.
Power Automate is one of the most powerful automation tools available in the market today. It allows you to automate tasks and make them repeatable, while also giving you control over when they get done. This makes it an ideal solution for businesses that want to improve their efficiency while reducing costs through automation. The best part? You don’t need any coding experience or expertise just need some data!
Monitor files and folders in your cloud storage that need attention.
Power Automate can monitor files and folders in your cloud storage that need attention. You can monitor specific files or folders in your cloud storage, for example, you can monitor for a specific file type like an image file or even a specific size like 10mb. You can also specify whether you want to be alerted when there are changes made to this folder by any user other than yourself.
You have the option of setting up Power Automate so that it will only notify you when something happens on these monitored locations but not alert others unless they access them as well - meaning they won't get any unnecessary notifications about what happened if they aren't interested in finding out themselves!
Automate expense approval processes.
Expense approval is a manual process that involves many people and can be difficult to manage. A company's employees are spread across multiple departments, each of which handles their own expenses separately. With an automated expense approval process, you can streamline the process so that it’s easier for all employees to approve expenses without having to contact each other individually or wait until after hours when someone else might be available at the right time.
Benefits of automation include:
- Reduced costs by eliminating manual tasks like filing receipts.
- Increased efficiency through fewer errors
- Improved communication between departments
for example, if there's an incident with supplies or equipment then everyone will know immediately instead of waiting months later when someone discovers it themselves.
Route HR forms to the right people for approval and processing.
If you’re a human resources manager, it’s likely that your team is overwhelmed with forms. You may have hundreds of them to process, and they can be lost or misplaced. Or worse still, some of the people who need to fill out certain forms may not have access to the information necessary for completing them (for example, if someone has left the company). And even if you do everything right and send the form off on time and then again later when someone else needs something from it. there's still no guarantee that all relevant data will be collected before being sent off again!
Coordinate tasks and keep notes at every step when you onboard new hires.
As you know, onboarding is a critical part of any new hire's journey. And it's important to make sure the process goes smoothly and efficiently so that everyone can start working together effectively as soon as possible.
With Power Automate, you can automate the onboarding process by creating tasks for each step in your employee's career path: filling out a form, uploading their resume or portfolio etc., scheduling interviews with managers or HR representatives etc., reviewing answers from previous rounds of interviews after they've already been conducted (and making changes if necessary). You'll also be able to collect feedback from your employees on how they feel about these steps by using surveys or polls, which will help you identify problems with your current system!
Track compliance requirements and make sure they come before any project goes live automatically!
Compliance is a big deal. It’s the foundation of any well-run business, and it can be easily forgotten when you have other things to do. We all know what happens when something goes wrong: you get blamed, or worse yet, you lose clients because of your poor judgment or lack of foresight. So how do we ensure that our compliance requirements are met before our projects go live? With Power Automate!
Streamline human-led processes that involve repetitive tasks that are not standardized.
One of the best use cases for Power Automate is when you have a process that is not standardized. A good example of this is when your company has multiple subsidiaries, each with its own business processes and procedures. The goal here is to ensure that everyone follows the same standards in order to create a consistent brand image across all departments.
The first step in streamlining this type of human-led process involves creating an environment where everyone understands their role within the organization and what they need from others in order to perform their jobs effectively. This can be achieved through creating standard operating procedures (SOPs) or creating business processes based on customer needs so that every employee knows how he or she should work with other departments within your organization.
Build automated workflows to connect your files, data and processes across your entire organization.
- Build automated workflows to connect your files, data and processes across your entire organization.
- The Power Automate Platform empowers you to build workflows that connect your files, data and processes across your entire organization.
Automate and streamline document processing using computer vision technologies, including optical character recognition (OCR)
- Automate and streamline document processing using computer vision technologies, including optical character recognition (OCR)
- Extract text from images in a variety of formats
OCR is the process of extracting text from an image. With OCR, you can extract any type of information from images such as barcodes, QR codes and more. The technology has been widely used in industries such as retail management where it helps identify product prices in store shelves for better inventory control; however, it can also be used for other purposes like automatically detecting handwritten numbers on documents to prevent frauds.
Document automation is particularly useful in the United States, where Power Automate simplifies the creation and management of documents. When combined with Power BI, Microsoft's powerful business intelligence tool, Power Automate flows become even more impactful, enabling data-driven decision-making and enhancing organizational efficiency.
Access data and workflows right from where you work with Power Automate in your favorite apps like Microsoft Teams.
Power Automate is available as a web app, so you can access it from any device. You can also use the Power Automate Connector for Microsoft Teams to access your data and workflows right from where you work with Microsoft Teams.
Keep your team in sync by providing notifications and alerts when something changes.
- Send notifications and alerts to your team in Microsoft Teams, Slack or any other channel.
- Power Automate can send notifications and alerts via email or text message.
- You can use Power Automate to create a single place where you can manage all of these notifications and alerts.
Automate approval and approval-like processes
One of the best Power Automate examples is automating email notifications. With a simple flow, you can receive real-time alerts for critical emails.
With Power Automate's robotic process automation capabilities, businesses can automate repetitive tasks, freeing up time for employees to focus on value-added activities. Embracing Power Automate ensures efficient business process automation and boosts productivity.
Automation is a great way to reduce the amount of human effort required for approval processes. With Power Automate, you can automate approval and approval-like processes with ease.
One example of an automated process would be the ability to approve a purchase order on behalf of your customer without having any involvement from them at all! Another example would be if you wanted to create a new product or service offering, this would require multiple approvals from various departments within your company before it could go live.
With Power Automate’s extensive feature set, there are many ways that you can automate existing business processes by using its Predictive Intelligence capabilities as well as its built-in Workflows feature which enables users to build complex workflows simply by dragging and dropping fields onto their form elements (or adding more advanced rules).
Getting started with Power Automate is easy, so what are you waiting for?
If you're new to Power Automate, there's a good chance you've heard about it. But if not,
here's what it is:
Power Automate is a cloud-based platform that helps businesses run more efficiently and effectively by streamlining their business processes with AI technology. It uses predictive analytics to identify problems in your organization's processes before they happen and then automatically solves them. For example, if your sales team misses their targets or sends too many emails per day (which would be bad), Power Automate can tell them this so they can improve next time around!
You can also integrate Power Automate with SharePoint, streamlining document approval processes and improving collaboration. When it comes to the best Power Automate Services, Microsoft offers an extensive range, including connectors for popular apps like Salesforce, Microsoft Teams, and more.
Conclusion
I hope this article has given you some ideas about how Power Automate can help your organization. Feel free to reach out if you have any questions or want to learn more!
Read More

Top 10 best use cases for Power Automate
Power Automate is one of the most powerful automation tools available in the market today.

If creating power apps app has always been on your mind but you didn't know where to start, then you have come to the right place. Power Apps is a versatile platform that empowers users to create mobile and web apps with ease. One of the great starting point is Free SharePoint templates. Whether you need a mobile app for on-the-go productivity or a web app for broader accessibility, Power Apps and SharePoint have got you covered.
In this blog you can learn how to create an app from free PowerApps templates, a blank canvas, and a data source. We will focus on canvas apps, which give you the flexibility to arrange the user experience and interface the way that you want it.
What is Power Apps?
Power Apps, part of the Microsoft Power Platform, allows you to build three types of apps:
- Canvas Apps: Highly flexible, drag-and-drop design for both mobile and desktop.
- Model-Driven Apps: Component-based apps with dashboards, forms, views, and charts.
- Portal Apps: External-facing apps for customers, partners, or vendors.
Creating power apps mobile app becomes a seamless process. Its intuitive interface allows users to design custom mobile apps tailored to their specific needs. You can get started in many different ways; however, for all of the options, you will use the Power Apps Studio features and functionality to build your app.
1. Create an App from a Template
A quick way to learn Power Apps is to start with templates. Templates come with sample data, letting you explore functionality and design before building your own.
Popular Power Apps Templates: (H4)
1. Budget Tracker Template
For example, you can use PowerApps budget tracker template to create an app that helps you track the budget for projects and events with custom categories, simple data entry, and visuals that highlight expenditures for an effortless inspection.
2. Issue Tracker Template
PowerApps issue tracker template to keep track of different issues, assign owners, and update statuses.
3. Knowledge Base Template
Centralize policies, troubleshooting guides, and training content. Optimized for mobile, so your team can access knowledge anytime, anywhere. Equip your team with the tools to find the information they need quickly and effectively. Embrace the future of workplace learning with our Power Apps Knowledge Base Template.
2. Create an App from a Data Source
Another great option is to build directly from your own data. Power Apps connect seamlessly to multiple data sources, including:
- Microsoft SharePoint lists
- Dataverse (formerly CDS)
- SQL, Excel, and many others
When you point Power Apps at a data source, it automatically generates a three-screen app that lets you:
- Browse records
- View item details
- Create, edit, or delete records
Power Apps + SharePoint Lists
SharePoint lists and Power Apps integrate tightly. You can:
- Build an app directly from a SharePoint site
- Customize modern list forms inside Power Apps
Read our guide: How to Build a Power Apps App from a SharePoint List
3. Build from a Blank Canvas
If you want complete creative control, you can start from scratch with a blank canvas. This option lets you:
- Add screens, forms, and layouts as you go
- Design custom user experiences
- Use connectors to link to multiple data sources
Think of this as freeform app creation perfect if you have a unique use case or want to experiment.
4. Explore Model-Driven Apps
For more structured, data-first applications, Power Apps offers Model-Driven Apps. These are ideal when you need:
- Dashboards with real-time insights
- Predefined business rules
- Components like charts, forms, and workflows
Examples of sample project templates in Power Platform include:
- Asset Checkout
- Innovation Challenge
- Fundraise
Why Power Apps is a Game-Changer
Power Apps isn’t just about making apps. it’s about transforming business productivity.
- No-code/low-code design - Empower non-developers to build solutions.
- Integration-ready - Works seamlessly with SharePoint, Teams, Office 365, and 400+ connectors.
- Mobile-friendly - Apps run smoothly across desktop, tablet, and mobile devices.
Final Thoughts
Whether you’re:
- Starting with a template,
- Connecting to a data source, or
- Designing from a blank canvas
Power Apps make custom app development simple and accessible.
For organizations using SharePoint, it’s an especially powerful way to turn lists and processes into mobile-first, automated solutions.

Ways to Build Power Apps: A Beginner’s Guide
If creating a Power Apps application has always been on your mind but you didn’t know where to start, you’ve come to the right place.
4 Easy-to-Implement SharePoint Design Examples
SharePoint Designs, as the name suggests we are all about creating aesthetically pleasing, innovative, clean and modern designs. We are committed to providing our clients with a world-class experience using our unique designs.
Not all designs have to be complicated and time consuming, some of the designs are very easy to do using the out of the box webparts provided by SharePoint.
Here we are presenting you 4 Best SharePoint design Examples for free which can be achieved easily with no or very minimal coding knowledge.
SharePoint Design Example 1

SharePoint Design Example 2

SharePoint Design Example 3

SharePoint Design Example 4


4 Easy-to-Implement SharePoint Design Examples
SharePoint is an enterprise content management system that allows users to create web applications
Power Automate is a cloud-based service that allows users to create automated processes in Microsoft
Create a new flow
You can use Power Automate to automate any process that requires input from a user. This includes creating emails, sending messages, scheduling meetings, and more.
Add a task
Once you add a task, you can choose what type of task you want to create. There are three options available: Create a new email, send an existing email, or schedule a meeting.
Add a webhook
You can also use a webhook to trigger actions when something happens on your website. This allows you to automate things like sending emails, updating a database, or even creating a new document.
Add a trigger
A trigger is a piece of code that tells Power Automate what to do when certain events occur. Triggers are triggered by different events, such as when a user visits a webpage, clicks a button, or submits a form.
Add a workflow
Once you’ve added triggers to your flow, you can add actions to them. Actions are pieces of code that tell Power Automate how to perform a task. You can use actions to automate any process, whether it’s sending out emails, creating reports, or performing other tasks.

5 Power Automate Flows Every Beginner Should Start Using
Power Automate is a cloud-based service that allows users to create automated processes in Microsoft
SharePoint is Microsoft's web content management system (CMS). It allows users to easily manage information across an organization's intranet or extranet sites. When it comes to examples of good SharePoint intranet sites, there are plenty of impressive ones to draw inspiration from. In this blog we provide you some samples of our SharePoint Intranet templates that can be leveraged to create engaging and interactive intranet portals that improve communication, collaboration, and knowledge sharing within organizations. These free designs provide a great starting point for building your intranet site and offer basic functionalities to get you up and running quickly.
If you're looking to buy SharePoint intranet examples, there are numerous options available that can enhance your SharePoint intranet site. These design examples can be easily downloaded and customized to fit your organization's needs. They provide a solid foundation for building a visually appealing and functional intranet site, saving you time and effort in development. These intranet design examples include a variety of features that allow you to customize the look and feel of your site.
A SharePoint Site is a collection of pages, lists, libraries, apps, web parts, configurations, features, content types, and sub-sites. Examples of Site templates in SharePoint include collaboration (team) sites, communication sites, organization sites, wiki sites, blank sites, and publishing sites.
The two main type of SharePoint intranet sites are:
Team Site
A SharePoint team site connects you and your team to shared content and resources. Use team sites to store and collaborate on files or to create and manage lists of information as well as:
- Track and stay updated on project status
- Organize and co-author shared content
- Connect to a Microsoft 365 group to access team resources
Communication Site
A SharePoint communication site is a great place to broadcast information to others. Share news, reports, status updates, and more in a visually appealing format. Use communication sites to engage and inform broad audiences.
- Create portals, department, or project-specific sites.
- Share company news, announcements, and events.
- Engage dozens, or thousands, of viewers.
Here are some of the SharePoint site design examples for free so you can kickstart your SharePoint intranet journey!
Intranet Home Page Design
Here is a SharePoint design example for a basic intranet site:
SharePoint Intranet Business Portal Design
A business portal is a website that provides employees with access to company news and services. It can help companies improve productivity by providing employees with easy access to information and tools.

SharePoint Intranet Collaboration Portal Design
This SharePoint intranet template includes a collaboration team site that allows users to share files, collaborate on documents, and communicate online.

Knowledge Base Portal Design
This template includes a knowledge base portal with an easy navigation menu, search box, and categories. It's perfect for any organization that wants to provide its employees with access to company information.

In conclusion, whether you choose to buy SharePoint templates, download free solutions, or explore Office 365 intranet templates, SharePoint offers a wide range of options to create impressive intranet sites. With its web parts, site templates, and integration capabilities, SharePoint online is a versatile tool that can be tailored to meet your organization's specific requirements. Contact us today so we can explore the best template that can get you started right away. We promise we can deliver a custom intranet site in as early as 2 days!!! So, what are you waiting for?

Launch Your New Site with These 4 Free SharePoint Examples
SharePoint is Microsoft's web content management system (CMS). It allows users to easily manage information
About the Client
Magick Woods Export Pvt. Ltd. is a wholly-owned subsidiary of Magick Woods Ltd., Canada - one of the top manufacturers and pioneers of quality bath vanities and kitchen cabinets. Some of their customers include Home Depot, Lowes, Menards, Rona, and Home Hardware.
Project challenges
- Lack of a quality check process at the end of the production line to ensure delivery of products that meet world-class standards
- An ineffective manual tracking system involving QC inspectors - due to the unavailability of a defect identification system
- No one-stop report repository in place for the management to review the number of open defects and statuses of defects
Our Solution
SharePoint Designs developed a QC form to update the defects in the system instantly. Equipped with a camera feature, the QC Inspector could upload or capture the images of defective items. The data stored in the back-end could be used for further analysis. Furthermore, the form could be easily accessed through handheld devices like mobiles or tabs. Using Power BI, a summarised report of the defects and their status was made available for quick reviews.
Our experience in working with different MS applications like Power Apps, Power Automate, Power BI played a major role in the quick roll-out.
Business Benefits
- Power to instantly reject defective products and eliminating any of their chances of reaching the end customer
- Vast reduction of worker hours involved in updating, correcting, and verifying the documents
- Ability of the QC form to captures the total defects recorded in a day
- Easy-to-interpret Power BI-based reports that facilitates a smooth management review process

Magicwoods – QC Form
One of the top manufacturers and pioneers of quality bath vanities and kitchen cabinets. Some of their customers include Home Depot, Lowes, Menards, Rona,

About the client
Daikin, a global air conditioning manufacturing company, has its employee base spread across countries and was looking for solution to reach the employees in their native language.
Challenges
The Intranet is a connecting tool for employees located across the world. The user-friendly intranet might fail to serve its purpose if it does not have a personal touch with the users. Giving the option to the users to read the content in the language they prefer, is an added advantage.
Our Solution
We used Azure translation services and configured 7 languages (Japanese, Mandarin, Indonesian, Portuguese, Spanish, Thai, Vietnamese). The translator tool was added as an extension, so the user can translate from anywhere on the site. Entire site contents except attachments are translated. The user is able comprehend the business in their own native language which brings real collaboration among the employees. The discussion board has a separate language option. The users can choose to comment using their preferred language and others can read it using translation tool similar to social networking tools.
Technologies used
Azure Translation services

Daikin – Translations
A global air conditioning manufacturing company, has its employee base spread across countries and was looking for solutions to reach the employees in their native language
Intranet, a powerful tool in the modern age helps to stay connected virtually with colleagues across the world. With the right design and content, an organization can use the intranet as an effective tool for communication. It isn’t just sharing news, business information, or management messages. Intranet can do more for business than we all imagine.
Here, we are elaborating on how Daikin, a global air conditioner manufacturing company uses the intranet as a tool to reach out to its employees. Daikin approached SharePoint Designs to redesign its intranet into an informational and engaging one.
The Home Page Contents
As we always say, we love to design SharePoint sites. Our very creative design team came up with multiple design ideas to keep the Intranet home page informative and lively. Here are the contents on the Home Page
- Unique top navigation bar: A custom extension was developed to display the top navigation bar across the site. The option consists of the Home Page, Discussion Board, Upload form, and other folder names. This allows the user to navigate across the site from any location. The top navigation displays the count of new uploads for the day.
- Welcome banner: A Personalized Welcome banner greets the logged-in user and displays the current date and time. It also provides quick links for manuals and contact details.
- Upload Form: A custom-developed upload form, using which users can create site pages. All files related to the site pages are stored in a unique folder in the document library that can be located easily.
- Discussion Board: The latest three discussion topics along with a brief description appear on the home page. Clicking on the title navigates to the discussion topic.
- Latest Uploads & Press Release: The recent four press release items and recent five uploads in all other folders are displayed on the Home Page – Press release & latest upload sections.
- Advanced search: The custom search bar is available throughout the site. The search results are refined to display results only from the site pages library. The users can easily find the information they are looking for with either a keyword search or use filters on the search bar. The results page is neatly designed with more filter options.
- Recommended Read corner: Select and featured articles are displayed in this section. This space can be utilized to display the Most viewed or liked site page for the month, announce contest winners, etc.
- Translator: To support the employee base across various countries, the intranet was designed with a translator tool. Reading the content in a language the user is comfortable has its advantages. Azure translation services are utilized and the employees can choose from the eight language options. The entire site contents, except the files, use azure translation services.
- Subscribe to periodic emails: Though the Home page is full of information, users might miss reading any important updates on the intranet. The new “Subscribe” feature allows users to stay in touch with what is happening around them. On each folder page, a subscribe option is available that the user can activate to receive an instant, daily or weekly summary of the uploads done. Using Power Automate flow, automated emails are sent to users based on their subscription frequency.
A well-built intranet plays a vital role in connecting remote teams, share knowledge and business updates. SharePoint Designs, understands the business values and envisions the complete solution. From design to deployment, we carefully plan and deliver outstanding intranets that help businesses engage with each other.

How Daikin collaborated across the globe through a simple & powerful tool - Intranet
Intranet, a powerful tool in the modern age helps to stay connected virtually
About the client
Daikin, a global air conditioning manufacturing company was looking for an innovative approach to collaborating and conducting interactive discussion topics among employees across the globe.
Challenges
An interactive and engaging platform for employees to discuss various topics that include industry-related, People related Hobbies, or other interests. Employees should be able to comment, view others' posts, and post likes. The discussion board should be as simple as using a social networking forum.
Our Solution
Though SharePoint has a default discussion board, we at SharePoint Designs built a custom webpart including Power Automate flows provides all the below features and gives the best user experience.
Discussion post owner and admin privileges
- Using a custom form, any user who has access to SharePoint can initiate a discussion topic and attach files to the discussion post and notify others through an automated email when the discussion is created.
- The discussion post owner can edit or delete his post.
- The Post owner will get notified when other users post like or comment on the discussion topic.
- Ability to close or reopen each discussion.
- Admin can Pin topics so that users can view them on the top on the discussion board page.
Discussion post users
- All users can like, comment and tag other SharePoint users or user groups on the discussion board post. Users will be able to edit or delete their comments.
- Tagged users get notified through an automated email.
- Users can view and download the attachments on the discussion post.
- Ability to Pin topics of their choice, search with keywords, share the discussion post link, and translate the contents.
Benefits
A very innovative and interactive tool that engages employees to actively participate in discussions, and contests. The organization that values their employees' feedback are always ahead in the competition. Discussion Board acts as an open forum to discuss with many people at a time.
Technologies
SPFx, Power Automate

Intranet Discussion Board as interactive as a social networking site!!!
Daikin, a global air conditioning manufacturing company was looking for an innovative approach to collaborating
About the client: Daikin, a global air conditioning manufacturing company, was looking for an innovative approach to collaborate and share knowledge with its employees across the globe.
Challenges
- A Proper document management system that classifies information based on pre-defined categories and allows users to access documents across the site
- A user-friendly site page so users can preview the documents attached, download, comment & tag other users.
- Enable users to click and search pre-defined categories on the site pages
- Restrict other users from viewing sensitive or confidential documents
- There should be an option to delete pages automatically based on the expiry date.
Our Solution
- SharePoint Designs understood the requirements and captured them as detailed user stories. As a first step, an upload form captured all the information required to create the site page in the SharePoint library. Each field in the upload form was metadata on the site page for search.
- The user who creates the page updates the mandatory information and need-to-know information on the upload form. Using the upload form, the user can upload any files and folder up to 5GB. The user has an option to notify users regarding the page upload through the upload form. Using Power Automate Flow, an automatic email with the brief content of the upload is sent to the users immediately.
- The user is also allowed to restrict access to all employees by using the “Who can access” field. The site page will be visible only to those user groups mentioned in the form.
- The created site page is detailed and allows users to like, comment, and tag other users. Tagged users will receive an automated email containing the link to the site page.
- The site page contains metadata, which allows the user to click and search the site pages library.
- Automatic page deletion is enabled through Power Automate flow based on the expiry date updated on the upload form.
- All users are enabled to download the files without opening them.
- The person who created the site page can delete his page without navigating to the site page library
- Using Power Automate, a flow is executed to identify any expired site pages and gets deleted on the mentioned date.
Admin Features
The site admins are provided with additional features to perform the below functions
- Option to edit or delete the site page of other users.
- Manage permissions by restricting or providing access even after the page is published
- Edit and delete other user comments
Benefits
The site page is power packed with so many details in a well-planned design and layout that the reader finds it very smooth to navigate to each segment of the page, click and search metadata and move on to the following pages in the chosen folder. Anyone who wants to share knowledge with other colleagues can use the upload form & share information.
Technologies Used:
SPFx custom webpart, Power Automate

How SharePoint Designs simplified site page creation with power packed features
Daikin, a global air conditioning manufacturing company, was looking for an innovative approach
"PowerApps gives me the ability dream up a business system, draw it, then make it at much quicker speeds that I could have done by learning to program."– Lars Peterson, General Manager (and app maker), Reliable Electric
Lars Peterson is a General Manager at Reliable Electric, Canada, who had no prior app development experience before using the Power platform. He taught himself PowerApps, Microsoft Flow and SQL, and used the Power platform to transform core business processes, such as creating daily work order estimates. This replaced a legacy system for which the company was paying $2,000 for a single seat, and was not user friendly or customizable to meet their exact needs.
Business scenario
Reliable Electric specializes in the design and installation of integrated electrical projects in high-end homes. To generate a work order proposal for a customer, they need to go through the process of analyzing drawings and determining the materials required to accomplish the design. The term used to define this process in construction and engineering projects is a takeoff. To put together a proposal, the estimator at Reliable Electric needs to generate accurate price estimates for all the takeoffs in a project. This requires a complex set of inputs followed by a lookup of product information and a series of calculations to generate a final customer-ready proposal with accurate estimates.
Before Power platform – business process, challenges and opportunities
Reliable Electric had purchased a legacy desktop-based software called Accubid. The process was as follows:
- A contractor would provide the plans
- Estimators would do the takeoffs and enter all the information into Accubid
- All information from Accubid was then copy-pasted into an estimation spreadsheet to get a final proposal

This solution had several challenges:
- According to Lars, “the interface was terrible, was hard to view and change certain data elements.”
- The output from Accubid had to be copy-pasted into a spreadsheet to get a proposal that met their needs.
- Only one person could use the tool at a time. Each additional seat was $2000, which was cost prohibitive.
- They needed a solution that provided them control over their data, with a user interface that was easy to use.
Power Platform solution – Work order estimation app
In a prior role, Lars Peterson was a small business consultant who researched multiple tools to help his customers but found himself almost always recommending Excel. He tried Access but felt it was complex and not something he could leave with the customer to maintain on their own. After joining Reliable Electric, he spent six months researching several estimation software solutions. He did not find any off-the-shelf tools that met his exact needs and decided to build a solution on his own using PowerApps and Microsoft Flow, with SQL as the backend. He found out about PowerApps through his Office 365 subscription. He chose it over other competitive offerings due to the rich visual appeal and depth of customization that was possible. He calls the solution “Estimating the Database” or ED for short. The application has been live in production since December 2017 and used daily by Estimators, Project Managers and Sales Representatives in the organization. It actively manages over 70 projects at any given point in time.

PowerApps: Estimators use a PowerApp on their desktop to manage the entire estimation process. They use predefined assemblies that have been customized for the business. These assemblies are basically takeoff templates that have a collection of products. The assembly is attached to a project and becomes a takeoff – an assembly with a quantity. The cost and labor associated with each takeoff is rolled up based on the products in the takeoff. Each takeoff is then priced based on this roll up with labor costs and other adjustments factored in. All of this happens automatically based on the defaults set in the estimate and can be customized as needed. The final output is stored in a SQL database. An Excel spreadsheet that is directly connected to the database is used to generate the final product list or bill of materials along with the proposal summary.
Microsoft Flow: Flows are used to trigger stored procedures in SQL and notify the Director of Projects & Design whenever a new product is added, or a new assembly created.
SQL Azure: All data for assemblies, product lists, prices and estimates are stored in a SQL Azure database.

Benefits from using the Power platform
- Reduced the time for data entry by half which allowed plans to get priced quickly
- Electricians found the app easy to learn and use, as compared to the old Accubid solution
- No more need for copy-pasting data, the spreadsheet is directly connected to the database which ensures that everyone always has accurate information
- They are in full control of the data – it is instantly available and can iterate through quickly

Solution architecture
The app uses SQL Azure for storing information about Assemblies, Products, Estimates and Proposals involved. The PowerApps application provides easy to use templates to key in the receptacle, view the assemblies and products involved, modify if needed per the customer’s request and generate an estimate for the client

Looking beyond a single app
Encouraged by the success of the estimator app, Lars has built several additional solutions. His goal is to modernize all instances where they use siloed spreadsheets for critical business processes and replace them with a PowerApps solution. He has brought on an additional resource to work on the backend SQL database layer, while he continues to develop the PowerApps Canvas apps.
- Employee Engagement: A phone app used to submit feedback, report vacation, 1-on-1 forms, and manage employee information.
- Product Updater: A tablet app built to edit product lists and vendor product information.
- Sales Tracker: A desktop app to enter and track opportunities and projects. Setting this up to link to QuickBooks through an Azure SQL synced database.
- Asset Tracker: A phone app that tracks all tools in the company. Plan to use the barcode feature in this app and populate it full of tools.
Additional screenshots
Work order estimator


Mobile apps – employee requests, asset tracking

Product updater

Sales tracker


Reliable Electric: Power platform customer story
PowerApps gives me the ability dream up a business system, draw it, then make it at much quicker speeds that I could have done by learning to program.
A very common question our customers ask is, how do I implement role based access control in my app. In other words, how do I make certain features or screens of my app available only to the authorized people in my organization. For example, make Admin screen available only to the users who belong to an Active Directory Group “Administrators” or make management views available only to the users belonging to the Active Directory Group “Managers” (as shown in the picture below).
In this blog post, I’ll show you how you can find out the Active Directory group membership of the signed in user and accordingly make decision to show/ hide certain features.

High Level Steps
We’ll use custom connector feature of PowerApps to connect to Microsoft Graph API for listing the Active Directory Groups that the user belongs to*. After getting the list of groups through this custom connector in PowerApps, we can easily check if the user belongs to a particular group and accordingly set the visibility of certain controls or screens.
Following are the broad steps:
Step 1: Register an app in the Azure Active Directory and request permission to use the right Graph API(s)
Step 2: Grant Permission requested above (An Active Directory Admin needs to do this)
Step 3: Add this app as a custom connector in PowerApps environment
Step 4: Use the custom connector in your PowerApps app
* Note:
- If you never used Microsoft Graph before, I strongly recommend that you checkout their documentation and graph explorer. I find Graph Explorer very handy to explore what’s out there and even test out the output of the specific APIs before using this in my own code.
- Graph API we are using here, lists the groups that the user is direct member of. So, it’ll miss out the group membership through nested group membership. For this blog, we are keeping it simple by just checking for direct membership. There are other Graph APIs for finding nested group membership too. However you’ll need to know group id (you can’t use group name for using that API). You can use the concept outlined in this blog to make use of this other API (after finding group id from the graph explorer). If there is enough interest, I’ll do another blog post showing how to use the other graph api.
Step 1: Register An App In The Azure Active Directory and Request Permission To Use The Right Graph API(s)
These steps are similar to the steps documented in this example of custom api.
1. Sign in to the Azure portal. If you have more than one Azure Active Directory tenant, make sure you’re logged into the correct directory by looking at your username in the upper-right corner.

2. Select Azure Active Directory -> App Registration
3. Select New application registration.

4. For Registering a New App, use following values:
Name: Any Name that you want to use ( I used “GraphAPIDemo”)
Application type: Web app/ API
Sign-on URL: https://login.windows.net
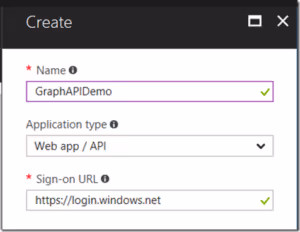
5. Once it is created, select this newly created app. Note down the application id (it’ll be used as Client Id in the later step of adding this API as custom connector in PowerApps environment). After noting down the application id, click “Settings” menu at the top.

6. From Settings, click on Reply URLs, add following url and hit save:
https://msmanaged-na.consent.azure-apim.net/redirect
Note- This url may not work for non US locations. If you get error, you’ll have to come back and add your location specific url. I’ll go in greater details about that error at a later step (where you register this as custom connector in PowerApps environment).
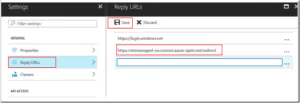
7. From Settings, click on Keys

8. Enter a description for the key, choose the expiry period, and hit Save. A new key value will be generated. Note down that value. You’ll need this key secret in later step while registering this API as custom API in PowerApps. (Note- very important to note down this secret in this step because you won’t be able to see this key if you come back to this screen later. )

9. Go back to Settings, click on Required Permissions

10. In the Required Permissions, click on Add and then Select an API:

11. On the next screen, select Microsoft Graph:

12. Click on Select Permissions:

13. Under “Delegated Permissions”, check following ones:
- View User’s Basic Profile
- View User’s Email Address
- Sign Users In
- Access Directory As Signed In User
- Read Directory Data
- Read All Groups
- Read All User’s Basic Profile
- Sign in and read User Profile and, hit “Select”

Step 2: Grant The Permissions Requested In The Previous Step (An Active Directory Admin Needs To Do This)
This step can be done only by the admin of the active directory. There are 2 ways to do this:
Option 1:
Ask the admin to the Azure portal, go to Azure Active Directory -> App Registrations -> and select the app you registered in the previous step. Go to settings -> Required Permissions, and click on Grant Permissions button at the top:

Option 2:
Send the following URL to the Active Directory Admin (it is typically someone from your IT Department). In the url below, put the client id (or application id) you noted while registering the app in the active directory. On clicking this url, your Active Directory Tenant Admin will get the prompt to grant permission.
https://login.microsoftonline.com/powerappsdemo1.onmicrosoft.com/oauth2/authorize?client_id=<Client-Id you noted earlier>&response_type=code&redirect_uri=https://msmanaged-na.consent.azure-apim.net/redirect&nonce=1234&resource=https://graph.windows.net&prompt=admin_consent
Step 3: Add This Registered App As A Custom Connector In Your PowerApps Environment
1. Go to powerapps and click on gear icon on the top right, and select “Custom Connectors”.
Note- if you are part of multiple Active Directory Tenants, make sure you sign in to the active directory tenant where you registered this app in the first step.

2. Once you get to Customer Connectors screen, click on “Create custom connector” and Choose the option to “Import an Open API File”:

3. You’ll get following dialogue box. By importing an OpenAPI file, you are essentially importing a Swagger file. Use the Swagger file I created for this scenario (Save it to your local drive, and use it for uploading OpenAPI file). For Custom Connector title, use any title you want. I used DirectGroupMembership.

4. “General Information” step is automatically filled using the information in the swagger file. Feel free to change the icon, description but don’t change Host and Base Url.

5. Click Continue. In the Security Step, Swagger file will help automatically select Authentication Type as OAuth2.0 and choose the Identity Provider as “Azure Active Directory”. Leave all the information as automatically filled. You just need to fill the following information:
Client id: <Application Id you noted down in the earlier step of registering your app in Azure Active Directory.” >
Client secret: <Secret Key you noted while creating Keys in the App registration in Azure Active Directory step earlier>
Resource Url: https://graph.microsoft.com/
Click Continue.

6. Next Step of Definition will have everything automatically filled out from the Swagger file. Don’t make any changes (except summary and description- if you want to)

7. Click on Creator Connector:

8. If you followed all the steps properly, clicking on “Create connector” should create the connector successfully.
If you see warning like following, scroll down and see if you see 200 Success message. If you see 200 Success message, please ignore the warnings. These warnings show up because my swagger file has extra parameters that are used by other Graph APIs. You don’t them for this example, that’s why it’s just warning.

Next step is to test it. Click on “Test” link and then “New Connection” on the Test Screen:

9. Click on “Create” from the Pop up dialogue box:

10. Sign in using your account:

If you are getting sign in error in creating connection, scroll down and see your error message. If the error message points to a different reply url than the one you specified while registering the app in active directory (Step-1) earlier, please add this reply address as a reply url in your app (reply url from your error message)

11. On successful sign in, you successfully registered Graph API with the right permission as a custom connector in your PowerApps environment. You should be all set to use it in your app. You can go ahead testing this in the portal by going to “Custom Connector”, selecting this connector and clicking on “Test”. For user id input, provide your full email (e.g. sudhesh@powerappsdemo1.onmicrosoft.com) and see the output. If all goes well, you should get 200 OK status.
If you are getting 404 error, please check the following in the graph explorer
Go to graph explorer, sign in, and try running following API (make sure you provide full email of the user id e.g. meganb@bappartners.onmicrosoft.com ).
https://graph.microsoft.com/v1.0/users/{userid}/memberOf


See if you can successfully get the list of groups here.
If you get permission error, please click on modify permission link and add following permissions (your Active Directory Admin will have to do this):
User.Read
User.ReadBasic.All
People.Read
Directory.Read.All
Group.Read.All
User.Read.All
People.Read.All
After ensuring that you get the groups list using Graph API as stated above, come back and test your custom connector in PowerApps. You should be good now.
If you are facing any other error, please double check that you followed following steps properly:
- The Registered App was Granted Permission by an Admin of the Active Directory (Ensure that the permission was granted before you registered this as custom connector in PowerApps environment)
- While registering the app, you provided proper reply url (if you got error during custom connection creation, you added additional reply url)
- While creating custom connector, you provided proper resource url
- You noted down the correct Client Id, and Client Secret. (Client Id is same as Application Id. Key is same as Client Secret)
- You are signed in to the Active Directory Tenant where you registered your app
- You could successfully run the api from Graph Explorer
Step 4: Use the custom connector in your PowerApps app
1. In the PowerApps environment where you created this custom connector, create a new app.

2. Create a blank app. Click on View -> Data Sources. You should see this Custom Connector you just created in the list of data sources (If not, click on “New Connection” and you’ll see that connector). Click on the Custom Connector you just created.

On click on this, your custom connector should be a Data Source in your App now. I see “Graph” as a data source now (this name came from the title given in the swagger file. Feel free to change that).
3. For quick testing to see if you are getting the groups, insert a button control and OnSelect action of the button, put following formula:
ClearCollect(MyGroups, Graph.ListUserGroups(User().Email).value)
Graph is the name of the data source (custom connector)

4. Preview the app and click on the button. Go back to design mode and check if the collection “MyGroups” has the list of the groups you are member of.

5. Getting some value in collection like above means you are able to successfully get the list of Groups, the signed in user is member of. You can now use this for setting visibility on or off of certain screens or controls. For example, if you have an Admin button on this screen, you can set the visible property of that Button to:
If(“Administrator” in MyGroups.displayName, true, false)
Note- in your application, you’ll most likely not have any button to get the list of groups. You’ll most like do this in the OnVisible event of your screen.
Hopefully this tutorial gives you a good overview of how to implement active directory group membership based permissions in your app. There are many steps involved here (incl. admin consent), so it’s a long post. However following all these steps successfully will also give you good idea of how to implement any custom connector in your PowerApps environment and how to make use of different Graph APIs.
Let us know your feedback and questions. Will be great if some of you can share your scenario or any additional tutorials you created on similar lines.
Related Links:

Implementing Role Based Security In Your PowerApps App
A very common question our customers ask is, how do I implement role based access control in my app. In other words, how do I make certain features or screens
Bookmark PowerApps Champs to continue learning about how Champions have used Power Apps in ways that are redefining their organizations, their careers, and their lives. Read about their impact–find out what makes them Champions.
Samit
Samit Saini was a security guard at London Heathrow Airport who enjoyed tinkering with technology like Excel and VBA. When he got access to Power Apps, he used it to digitize some of the paper-based processes at Heathrow such as providing translations for common questions asked by international passengers, performing customer experience audits, and supporting passengers with reduced mobility.
Heathrow has benefitted greatly from this level of substitution, having already saved more than 11,000 sheets of paper, 850 hours of time, and $460,000 in potential app costs. They cite that every 25,000 sheets of paper saved equals about 3 trees. But as Samit puts it, “In Heathrow, we’re not trying to save trees, we’re trying to save the forest.” With this type of implementation, Power Apps is reducing the consumption of resources of paper, time, and money.
Watch a video on Samit’s journey: MeetSamit

Martin
Martin Lee has built 50+ apps over the past year for a variety of use cases such as field technicians, call center agents, and executive conferences for Autoglass® (part of Belron® group). Belron® is a vehicle glass repair and replacement group operating worldwide across 34 countries and employing over 25,000 people. With the data collected from apps, they are generating insights and reports getting much more than they had originally planned to do.

Nick
Apps could be made by anyone, for anyone, to solve anything. But they could also be done any time. At the American Red Cross, a volunteer had created an app while deployed during Hurricane Harvey. The app allowed volunteers to check-in and report on their status. It was a simple use case, but had significant value, and it was made ad hoc. Nick Gill, a trainer at the American Red Cross, described this app in his Microsoft Business Applications Summit presentation, along with the app he built for First Aid & CPR instructors to order training supplies such as gloves and masks.
Learn more about the American Red Cross.

Camilla
Camilla Friedrichsen is a Quality Management Specialist at the LEGO Group headquarters in Billund, Denmark. She created a solution to track and communicate product quality issues with the development and operations teams at LEGO. All the information on a quality issue became available in one spot, her team did not need to search elsewhere for additional information, such as pictures. Managing access was easy as SharePoint gave the flexibility of maintaining granular level permissions. Her team was able to implement the solution for themselves, without needing IT to build it for them.
Learn more about Camilla and the LEGO Group - MeetCamilla

Vanessa
At Standard Bank, Africa’s largest bank in terms of assets, Vanessa Welgemoed is on Ian Doyle’s team which has modified the company’s app-building process. As part of their approach, they elicit ideas from those in their organization on what apps they want. Those who share ideas are also invited to learn how to build the apps themselves, so that they are not reliant on central IT. With this implementation in place, Standard Bank collectively has over 100 apps in production and is continuing to grow at a rapid pace as the energy and interest in the Power platform continues to grow.
See how Standard Bank is using Power Apps

Remi
SNCF is France’s national state-owned railway company that operates the country’s national rail services. Rémi Delarboulas, a digital adviser in the digital transformation team took the initiative to build a Power Apps application called Digi Bogies. The aim was to reduce the error rate and streamline the work required to perform this operation. The result was a very intuitive user experience that culminated in the app providing a list of recommendations and guidance around optimal spring placements.
Learn more about SNCF at: Power Platform Customer Success Story

Jonathan
Jonathan Oberhaus is an example of someone whose job is to make apps: not any ordinary apps–but specifically Power Apps. At DriveTime, he has shipped four solutions in production and continues to grow the app portfolio for scenarios such as insurance claims management and contract employee management.
DriveTime started its Power Apps journey as an early adopter in 2016 with Travis Bliele, a business analyst with Power BI and SQL background but no app development experience. He had created a mobile solution for DriveTime car buyers to inspect vehicles at auctions. As the impact of the Power platform grew, the company created a full time Power Apps developer position filled by Jonathan Oberhaus.

Keith
Arriva is one of Europe’s largest transport providers. They operate ~18% of London’s bus service and service ~2.4 billion passenger journeys each year. Keith Whatling had used Power Apps and the Common Data Service to digitize management of the quality process in Arriva London’s operations center. Management and staff could stay more connected in order to continually improve the quality of their operations.
Keith speaks passionately about ‘digital inclusion.’ To quote Keith, Power Apps is a tool that “democratizes technology, one where the cost of quality apps, processes, and data are in the hands of those that need it, not just those who can afford it. It’s the pebble in the pond. A game changer.” He sees how Power Apps makes it possible to build ‘never apps’ apps that would never be built for small teams. Everyone can have an app.

Eric
At G&J Pepsi, the largest family-owned bottler for Pepsi-Cola products, Eric McKinney was managing the company’s migration to the cloud and rolling out services such as Office 365 and Skype. He substituted a paper-based store audit process with Power Apps. With real-time reporting, the company was able to respond much more quickly to issues and reduce errors. On top of that, G&J Pepsi was able to use rich PowerBI reports to derive insights over the aggregated data such as their top in-store competitors on a per-region basis. Since 2016, Eric has built several cross-platform solutions using Power Apps for auditing stores, managing merchandise and tracking resources.
Watch a video on Power Apps at G&J Pepsi

Ludovic
SNCF Railway has a growing community of app makers. They have thousands of app makers on their Yammer channel for Power Apps. While to some this is a large active community, to Ludovic Malondra, a digital transformation leader at SNCF, he sees this as a relatively small number. His goal is to expand Power Apps adoption to all 165,000 employees at the company, redefining the expectations of growing community.
Learn more about SNCF at: Power Platform Customer Success Story/

Ashlee
Never doubt that a twitter contest could change your life. Ashlee’s Power Apps story begins with a fidget spinner–not an ordinary one, but a digital one. Having learned about a challenge to see who could build a fidget spinner in Power Apps, Ashlee used her knowledge of trigonometry to animate a spinner that wowed the Power Apps team and won the contest.
Today she builds complex apps with her dad and leads hackathons where participants of all ages learn Power Apps and crucial life skills.

More Resources
Would you like to learn about more customer stories? Visit

Meet the Power Apps Champions
Bookmark PowerApps Champs to continue learning about how Champions have used Power Apps in ways that are redefining their organizations, their careers,
Introduction: Why Power Apps
Have you ever wished you could build your own app without being a professional developer?
With Microsoft Power Apps, that dream becomes a reality. Power Apps is part of the Microsoft Power Platform and allows anyone from beginners to IT pros to create apps with drag-and-drop simplicity.
Whether you want a mobile app for your team, a SharePoint-integrated solution, or a knowledge base your company can carry in their pocket, Power Apps has you covered.
But here’s the big question: How do you start?
There are three main ways to build apps in Power Apps:
- Start from a blank canvas
- Start from data
- Start from a template
This guide will break them down, show Power Apps examples, and help you decide which method is best for your business.
1. Build a Power Apps Canvas App from Blank
Starting from scratch gives you the most flexibility. With a Power Apps Canvas App, you can design the app exactly how you want it, think of it like drawing on a whiteboard.
- Canvas App from Blank: Design the UI freely with drag-and-drop tools.
- Model-Driven App from Blank: Powered by your data model, with prebuilt forms, dashboards, and charts.
- Portal App from Blank: Create external-facing websites and apps for customers or vendors.
When to use Canvas Apps:
- You need a custom business solution.
- You want to integrate with SharePoint app development or external data sources.
- You’re solving a problem that templates don’t fit.

3 Ways to Build a Power Apps App (and How Consulting Can Help You Get It Right)
Empower your team to start building and launching apps right away using pre-built templates drag-and drop simplicity, and quick deployment.
Customer-first priority
One of the highest priorities for North State Grocery is keeping customers happy at both of its chains. When a popular customer service program became a bottleneck for responding to customer requests for new products, the customer service team worked with SkyLite Systems to replace it.
The new solution unlocks customer data from Microsoft SharePoint Online a familiar tool for the staff making it possible for all stakeholder departments to access and update the database from any connected device.
It also helps keep data and alerts moving smoothly, preventing requests from falling through the cracks all while increasing the value of Office 365 and the company’s Microsoft investment.
“This tool makes managing the customer relationship much easier.
Now we know that nothing is going to fall through the cracks.”
- Lynn Martinusen, Customer Service Manager, North State Grocery
Competitive industry needs
Holiday Market and SAV•MOR Foods, the two formats that comprise the North State Grocery regional grocery retail organization, operate in an extremely margin-sensitive, competitive industry.
With limited square footage and big competitors in the northern California market, it’s critical for these operations to be highly customer focused. That’s why the stores rely heavily on strong customer service to attract and retain loyal customers in-store, at the point of purchase, via email, and on social media.
One way the stores cater to their customers is by using shelf signage to solicit suggestions for new products.
“You can call us, and we’ll do our best to bring in any item that’s available and feasible for us to carry.
We’ve always received great reviews from customers for working with them to stock products that are important to them.”
- Lynn Martinusen
Growing complexity of customer needs
- Natural and organic products expanding exponentially made it harder to keep up.
- Many new and niche products were emerging, making buyer/vendor selection challenging.
- Small store footprints meant limited shelf space.
“We rely on our customers to tell us what they want to see in our stores.”
-Martinusen
- Customer request program existed for 28 years.
- Managed by a small team of four.
- Used Microsoft Access database.
- Became difficult to:
1. Respond to requests
2. Manage follow-ups
3. Keep buyers, customers, and managers in sync
4. Prevent requests from being lost
Martinusen:
“It was a huge responsibility… the old system just wasn’t conducive to having everyone work with the program.
Instead, it was a bottleneck.”
Building the new solution
North State worked with SkyLite Systems (Microsoft Partner Network) to design a modern platform.
How it started:
- Began with a simple sketch on paper of requirements.
- Built a custom Microsoft SharePoint Online list form using Power Apps.
- Integrated with an existing customer database in SharePoint.
- Leveraged Microsoft Flow (11 automated flows) for alerts and lifecycle tracking.
Benefits:
- No training needed familiar SharePoint UI.
- Nontechnical staff could build reports and metrics with 20+ list views.
- More than 50 users now collaborate across departments (vs. 4 in old system).
How it works
- All requests stored in SharePoint lists.
- Stakeholders use Power Apps forms to view request details.
- Automated email alerts go to buyers, managers, and customer service.
- SharePoint Quick Edit list view feels like a spreadsheet for updates.
- Deep integration with Outlook and Flow ensures tasks are completed.
Chennault:
“This spreads the workflow and decision making to staff who are directly responsible… eliminating the bottleneck.”
Rollout and adoption
- Built in 10 days → tested by customer service → rolled out to buyers.
- Added quick edit functionality for ease of use.
- Training delivered via manual + video uploaded to SharePoint.
- Now managing nearly 300,000 customer records and 1,200 items, with 50+ new requests weekly.
Results and impact
- Time savings: 15 minutes saved per customer contact.
- No middleman: Store managers can instantly check status or trigger actions.
- Positive customer reviews: Yelp, Facebook, and hotline praise follow-up.
- Better employee adoption: Buyers and managers find it manageable.
- Maximized Office 365 investment: No new software required.
“Power Apps has created a way for us to easily share important information about customer requests
for new products with our stores and senior management staff.”
- Lynn Martinusen
Final takeaway
North State Grocery successfully modernized a 28-year-old customer request program by combining SharePoint, Power Apps, and Microsoft Flow.
The result: Greater efficiency, Stronger customer loyalty, and Higher value from Microsoft 365.
Grocery chain in northern California and southern Oregon boosts customer relationships with custom app
One of the highest priorities for North State Grocery is keeping customers happy at both of its chains.
As an App Maker, before you begin building your Power Apps solution, it's recommended to go through a design process. When designing your Power Apps solution, there are several different factors to consider, such as:
- Business requirements
- Data Model
- User Experience (UX)
- User Interface (UI)
- Business Logic
- Output
By going through a simple design process, you can flush out any minor issues before they become a larger problem once the app has been put into production. It is also important to understand that this design process is for Canvas apps.
So how do you go from a simple blank Canvas app, as seen below?

To a fully customized Canvas app solution?

Understand the needs of the user
One of the most powerful and, at the same time, challenging parts of building a canvas app is that you start with a blank screen. This gives you the ability to build what you want, but to do that you have to know what you want.
In many cases, when purchasing software to solve and or streamline business solutions, there are many business processes that don't quite fall within the software's supported guidelines. When you run into this issue, typically, there are several internal discussions and meetings held to determine how those unsupported processes can be updated/altered to meet the software requirements. For most organizations, this isn't ideal because of the cost or time takes to update those business processes. The great news is, by using Power Apps to build your solution, you won't have to worry about unsupported business solutions. Why? With Power Apps, you can build a custom solution tailored to the exact needs of your business requirements.
Often when building an app, you are tempted to recreate the piece of paper or legacy software-driven process exactly. This is possible but might not be the ideal solution. By challenging the existing process and asking what it is the business needs to do, not what does the piece of paper or old software allows you to do, it opens the possibility of better, more efficient processes. For example, maybe on the paper process, the user had to type notes about what they see. Would it be better instead to just take a picture? This type of thinking will lead to better apps and better outcomes.
Business Requirements
Every app you develop will have a different set of business requirements based on the solution. Taking the time to think about all the requirements is key to rolling out a successful production app.
Depending on the solution or company policies, you may have certain security, privacy, or compliance requirements you must follow. For example, let's say you are collecting secure personal information in the app. You will want to ensure this information is securely stored and not visible to everyone.
During this process, you will also want to identify any government regulations or authentication/authorization requirements (if applicable). You don't necessarily have to have all the answers to your questions here; you just want to know all the requirements.
Offline Mode
One of the first questions to consider when developing your application is, will the app need to function offline? If so, will the entire app or only part of the app needs to function offline? When will the data be synchronized to my data source? Are there any limitations?
This is important to consider during the planning phase because if you were to build your app without this functionality, then decide to add it later, it will be more difficult than just doing it in the first place. Why is this? You will need to make sure you are using collections and additional functions like SaveData and LoadData as you go along to allow your app to function offline. Also, if you are using Forms and trying to implement Offline mode, you will run into issues.
There is a thorough discussion that needs to take place around Offline mode, and it's best to have this early in the design process as it will affect the rest of the process.
Data Model
In the "Power Apps related technologies" module, you learned about some of the common data sources for building apps, but with all these choices how do you actually decide which data source to use for your solution? Maybe you already have a data source implemented that users work with on a day to day basis, like SharePoint. Could you just use this as your data source to build your app? Do I need to connect to multiple data sources? These are all common questions you should ask yourself and there are number of additional factors to consider, such as:
- Business Requirements – Every data source and it's supported functionality is slightly different. So, depending on your app requirements you need to select the data source that supports your needs or modify your business requirements to comply with the supported functionality for the selected data source.
- Licensing/Cost – Certain data sources like the Common Data Service or SQL are considered a "premium data source". A premium data source will require each user who uses the app to have a Power Apps Per App Plan or a Power Apps Per User Plan. For more information about licensing, see Power Apps pricing
User Experience (UX)
By designing your Power Apps solution in a Canvas app, you have complete control of the end-user experience. This allows you to fully customize nearly every aspect of your app. However, just because you can doesn't necessarily mean you should. When designing your Power Apps solution your goal should be to keep it simple. When your end users open the application and begin using it, they should have no confusion about what to click on or where to go. If your app requires an extensive training program for users to understand how to use it, you may want to rethink your app.
Some of the basic designs elements you will want to consider are things like:
- Custom Branding (your logo and colors)
- Pop-ups
- Hide/show buttons based on users' access/permissions
One of the most common User Experience enhancements you can implement in your applications are Pop-ups. By implementing pop-ups, you can provide the users with a simple, but useful visual to confirm what the user clicked on went through or maybe your pop-up acts as a loading screen as the logic on the backend is processed. For example, in the screenshot below when a user clicks on "Submit", we might have a simple pop-up display to let them know their submission was successful.
User Interface (UI)
To fully visualize the User Interface or UI, you may want to consider creating a mockup of your application. Two common ways to create a mockup of your application are below:
Use Visio to create a wireframe diagram. A wireframe is a visual representation of an application's user interface. To begin, there are various website and mobile wireframe templates available, or you could start from blank template. The diagrams are a quick way to show app functionality and gain team consensus on the design.
The example below shows a simple Visio wireframe of a Purchase Items screen in an inventory app.

Use Power Apps to create a mockup of your application. You can add most of the controls, graphics, forms, and other items to your app screens and play with the layout and size for each element as if you were building the app for real. When designing the UI you don't need to add the logic behind the various elements you placed on the screen.
The goal here is to focus on what the app could look like and how it could function. This similar to what you can do with a Visio wireframe but one of the biggest pros of going this route is that you will gain more experience working with Power Apps and also learn more about the various UI elements available in the process.
All of the experience and knowledge you will gain by creating your app mockup in Power Apps will only payoff later when it's time to start on the production app. Another big upside to using Power Apps for your mockup is that if you show this to your team and they like what you did, you can continue building off this app or create a new app and copy the elements you would like to keep to your other application. By not having to redo the UI or only having to redo parts of it, you could potentially save yourself hours of work.
The example below shows a simple mockup of a New Purchase Order Screen.

It really comes down to your preference and comfort with the software you are using to create the mockup. You should also consider licensing and costs when making this decision. Visio requires additional licensing to get the full functionality required for creating a wireframe diagram. Whereas with Power Apps, it doesn't matter which license you have. As long as you have Power Apps (and sufficient permissions in your environment), you can create apps and mockup apps.
As you design the User Interface, a few additional things to think about are Accessibility and Localization. It's important to ensure the app interface follows accessibility guidelines so all your users can interact with your application without any issues. To review these guidelines and additional accessibility properties, see Create accessible canvas apps in Power Apps.
Localization can be something you must consider when developing your application as well. Depending on where your app will be used, you may need to use different punctuation. For example, some regions of the world use a . (dot or period) as the decimal separator while others use a , (comma). For more information on building a globally supported application, see Build global support into canvas apps .
Business Logic
When using the common data service, you can create business rules and recommendations to apply logic and validations without writing code or creating plug-ins. The great thing about the common data service and business rules is that they are applied at the data level. This means that you can apply rules that are enforced regardless of how the data is accessed.
Often when building apps all of the business logic is built into the app. This works great if the data is only accessed via the app. The challenge is often business data is used in many ways and from different tools. This is where Business Rules shine. You can apply logic on the data in the Common Data Service, allowing your rules to be enforced no matter which tool interacts with the data.
For example, you have built a capital project expense tracking application using Common Data Service as the data source. In your business process, the duration field is an optional field if your request is less than 10,000 but the duration field is required if the request is more than 10,000.
After you set up your entity in Common Data Service, you would then apply a business rule that says if Project Amount is greater than 10,000 then make Project Duration a required field. Now, regardless of how the user interacts with the data, the Business Rule will be enforced, keeping your data integrity.
Output
Finally, you will want to discuss your app's data output. This simply means what type of data will your app generate, and once the data is generated what will be done with it? A few questions to ask your app stakeholders:
- How does the data need to be visualized?
- What actions will be taken on the data once it is collected?
- Are there specific format or file types the data are needed?
The answers to these questions will help determine if additional functionality needs to be added to the app such as a Power BI report, email output, PDF, or CSV.
Let’s look at an example. Perhaps your organization has a legacy ERP solution and the orders submitted in your Power App need to be reflected in the ERP application. While one option might be to build a custom connector to that solution, another option may be to export the data to a CSV file using Power Automate and Power Apps together, see screenshot below:

The great thing about generating this CSV file export is that it's not linked to your data, so the changes you make to the file will not alter the app data.
If you need our team to build this types of PowerApps for your business. Please submit the form!
Related Blogs
Checkout our other blogs related to building Power Apps:
https://www.sharepointdesigns.com/blog/ways-build-power-apps

Designing a Power Apps app
As an App Maker, before you begin building your Power Apps solution, it's recommended to go through a design process. When designing your Power Apps solution
Welcome to Microsoft Power Apps. This self-paced, online module helps you build apps from the ground up.
In this module, you will:
- Explore how Power Apps can make your business more efficient.
- Learn which technologies to use to perform tasks in Power Apps.
- Learn about the different ways to build an app in Power Apps.
- Create your first app from data in a Microsoft Excel workbook.
In this introductory module, you'll learn how to create an app from data in an Excel workbook. As a prerequisite, you'll download a workbook that contains sample data. Next, you'll upload the workbook to Microsoft OneDrive for Business, where you can share the data with others. Then, you'll build the app without using code.
Power Apps is a suite of apps, services, connectors, and a data platform that provides you with an opportunity to build custom apps for your business needs. By using Power Apps, you can quickly build custom business apps that connect to your business data that is stored either in the underlying data platform (Common Data Service) or in various online and on-premises data sources (SharePoint, Excel, Office 365, Dynamics 365, SQL Server, and so on).
Apps that are built by using Power Apps provide rich business logic and workflow capabilities to transform your manual business processes to digital, automated processes. Power Apps simplifies the custom business app building experience by enabling users to build feature-rich apps without writing code.
Power Apps also provides an extensible platform that lets pro developers programmatically interact with data and metadata, apply business logic, create custom connectors, and integrate with external data.
With Power Apps, you can:
- Build an app quickly by using the skills that you already have.
- Connect to the cloud services and data sources that you're already using.
- Share your apps instantly so that coworkers can use them on their phones and tablets.

When it comes to using Power Apps to get things done and keep people informed, your options are nearly limitless. The following examples can help you think about how to use an app, instead of traditional paper notes, to run your business:
- Equipment in the field -Often, company representatives who visit customers in the field carry clipboards to help guarantee a paper trail of parts with scheduled replacement dates. By running an app on a tablet, reps can look up the customer's equipment, see a picture of a part, test and analyze the part, and then order new parts. Reps can perform these tasks on-site instead of leaving the customer's warehouse.
- Restaurant employee management - Employees of a large restaurant might fill out work schedules and vacation requests on a piece of paper that's affixed to a wall. With Power Apps running on everyone's smartphone, employees can open the app to record the same information, anywhere, anytime. The app can even send reminders for the start of the next day's shift.
If you're a beginner with Power Apps, this module gets you going quickly; if you're familiar with Power Apps, it ties concepts together and fills in the gaps.
Power Apps building blocks
Power Apps is a collection of services, apps, and connectors that work together to let you do much more than just view your data. You can act on your data and update it anywhere and from any device.
To create, share, and administer apps, you'll use the following sites:
- Make a Power App - On this site, you can open apps, specify the type of app that you want to create, share your app, and create data connections and flows. To use this site, you'll need to log in by using your organizational account.
- Power Apps Studio - On this site, you build apps by configuring user interface (UI) elements and Excel-like formulas.
- Power Apps admin center - On this site, you'll define environments and data policies.
Note:
To use these sites, you'll need to sign in by using your organizational account.
When you've completed your tasks, you can run your apps in a browser or in Power Apps Mobile (available for Windows tablets, iOS devices, and Android devices).
Related Blogs
Checkout our other blogs related to building Power Apps:

Introducing Power Apps
Welcome to Microsoft Power Apps. This self-paced, online module helps you build apps from the ground up. Explore how Power Apps can make your business
This unit explores each part of the following Power Apps components:
- Power Apps Home Page - Apps start here, whether you build them from data, a sample app, or a blank screen.
- Power Apps Studio - Develop your apps further by connecting to data, adding and arranging user interface (UI) elements (known as controls), and building formulas.
- Power Apps Mobile - Run your apps on Microsoft Windows, Apple iOS, and Google Android devices.
- Power Apps Admin Center - Manage Power Apps environments and other components.
Power Apps Home Page
If you are building an app, you'll start with the Power Apps Home Page. You can build apps from sample apps, templates, or a blank screen. All the apps that you've built appear here, along with any apps that others have created and shared with you.

Power Apps Studio
Power Apps Studio is where you can fully develop your apps to make them more effective as a business tool and to make them more attractive. Power Apps Studio has three panes that make creating apps seem more like building a slide deck in Microsoft PowerPoint:
- Left pane - Shows a hierarchical view of all the controls on each screen or a thumbnail for each screen in your app.
- Middle pane - Shows the canvas app that you're working on.
- Right pane - Where you set options such as the layout, properties, and data sources for certain controls.

Power Apps Mobile
Power Apps Mobile for Windows, iOS, and Android devices allows you to use all the apps that you've created, and those others have shared with you, on your mobile device. You or your users can download the Microsoft Power Apps app from the appropriate app store. When users log in with their credentials, they will see all apps that have been shared with them. The Power Apps Mobile app only needs to be downloaded once.
When you use apps in Power Apps Mobile, you get the most out of your device's capabilities: camera controls, GPS location, and more.
Power Platform admin center
The Power Platform admin center is the centralized place for managing Power Apps for an organization. On this site, you can define and manage different environments to house the apps. For example, you might have separate environments for development and production apps. Additionally, you can define data connections and manage environment roles and data policies.
Licensing
Most users get their initial start with Power Apps by utilizing one of the licenses that come with their Microsoft 365 Plan or Microsoft Dynamics 365 license. These licenses allow you to extend the functionality of the app that is licensed. This means if you purchased a Microsoft 365 plan that included a Power Apps license then you can build apps that extend and use SharePoint as a data source. But Power Apps doesn’t have to stop at just extending that platform.
Power Apps has over 300 available data source connectors available including Common Data Service. To incorporate Common Data Service or any of those additional connectors all users of the app will need a premium license. There are two different ways to acquire a Premium license:
- Per App model
- Per User model.
The Per App license plan allows individual users to run two applications and one portal for a specific business scenario in a specific environment based on the full capabilities of Power Apps with access to premium connectors. The Per User license plan allows users to run unlimited premium licensed apps. This gives you the ability to grow with Power Apps and control costs by purchasing the license that best matches your business goals.
In addition, Power Apps also has the capability to use Power Apps portals to build externally or internally facing websites using Common Data Service and Power Apps controls. Power Apps portals have their own licensing model and are not included in any of the licenses discussed previously above. With Power Portals you will purchase a capacity based license to meet your business needs.
Review the following links about licensing.
Microsoft Power Automate pricing
Microsoft Power Apps portals pricing.
Related Blogs
Checkout our other blogs related to building Power Apps:

Power Apps building blocks
This unit explores each part of the following Power Apps components: Power Apps Home Page - Apps start here, whether you build them from data
Microsoft Power Apps works with other technologies to help you build powerful apps for your organization. Some of these technologies include:
- Data sources - Without data, you don't have a business. Data sources bring cloud and on-premises data into your apps. You access data through built-in connections, custom connectors, and gateways.
- Common Data Service - A compliant and scalable data service that's integrated into Power Apps.
- Power Automate - Allows you to build automated workflows to receive notifications, run processes, collect data, and more.
Data sources, connections, and gateways
In Power Apps, most canvas apps use external information that is stored in Data Sources. A common example is a table in an Excel file that is stored in OneDrive for Business or SharePoint. Apps access these data sources by using connections. Some connections allow Power Apps to read and write stored data. In Power Apps, you can add many data sources to your apps through built-in or custom connectors. Some of the most popular data sources are shown in the following figure.

Many data sources are cloud services, like Salesforce. Even Twitter can be a data source if, for example, you're tracking your company's hashtags. Connectors might not seem like the most exciting part of app development; however, they're essential when you work with data that you, your colleagues, and your customers care about. When an app shows up with your data source for the first time, you might suddenly find that they are, in fact, exciting.
For data that's stored on-premises instead of in the cloud, you can use a gateway to provide a reliable connection between Power Apps and your data source. The gateway sits on an on-premises computer and communicates with Power Apps.
An advantage of building your business apps in Power Apps is being able to connect to many data sources in a single app. With the connectors in Power Apps, you can connect to where your data lives. To learn more about data sources in Power Apps, refer to the Working With Data learning path.
Common Data Service
An important data source option to explore further is the Common Data Service. Common Data Service lets you store and manage data that's used by business applications. Data within Common Data Service is stored within a set of entities. An entity is a set of records that are used to store data, similar to how a table stores data within a database. Common Data Service includes a base set of standard entities that cover typical scenarios, but you can also create custom entities that are specific to your organization and then populate them with data by using Power Query. App makers can then use Power Apps to build rich applications by using this data.

For information on purchasing a plan to use Common Data Service, refer to the License and Pricing information pages.
Reasons to use Common Data Service
Standard and custom entities within Common Data Service provide a cloud-based storage option for your data. Entities let you create a business-focused definition of your organization's data for use within apps. If you're unsure if entities are your best option, consider the following benefits:
- Simple to manage - Both the metadata and data are stored in the cloud. You don't need to worry about the details of how they're stored.
- Helps to secure data - Data is stored so that users can see it only if you grant them access. Role-based security allows you to control access to entities for different users within your organization.
- Access your Dynamics 365 Data - Data from your Dynamics 365 applications is also stored within the Common Data Service, which allows you to quickly build apps that use your Dynamics 365 data and extend your apps by using Power Apps.
- Rich metadata - Data types and relationships are used directly within Power Apps.
- Logic and validation - Define calculated fields, business rules, workflows, and business process flows to ensure data quality and drive business processes.
- Productivity tools - Entities are available within the add-ins for Microsoft Excel to increase productivity and ensure data accessibility.
Related Power Platform technologies
As you continue developing your application, you may want to consider implementing additional Power Apps related technologies such as Power Automate and or Power BI. For example, you may have a simple Expense Report App that requires an approval before an item can be purchased. With Power Automate, you can create a simple Flow to make this happen. Or maybe you want to display your data with custom charts and graphs giving your users a more visual look into the data, which can often be useful. In this section, you will learn more about some of the other Power Platform technologies and how you could apply them in your own Power Apps solution. Keep in mind, if you decide to implement these Power Apps related technologies you should also review their licensing structure and associated costs.

Power Automate
Power Automate brings automation to your business. This can be traditional workflows via flow, Robotic Process Automation (RPA) for automating legacy systems via UI Flows, or business process automation via Business Process Flows. Each of these capabilities increases your productivity to connect disjointed systems to build the business solution you need and make your app more powerful.
You can use Power Automate to create logic that performs one or more tasks when an event occurs in a canvas app. For example, configure a button to execute a flow to do one of the following: create an item in a SharePoint list, send an email or meeting request, or add a file to OneDrive. The button could be configured to do all of those in a single Power Automate flow. You can configure any control in the app to start the flow, which continues to run even if you close Power Apps. Below is an example using Power Automate to send a flow:

Identify Flows in your Solution
Now that you have a general overview of Power Automate, how do you determine if the solution you’re building requires a Flow? There are a number of simple functions Power Apps can do, like sending an email when a button is pressed in your application. This email generated from Power Apps can also contain dynamic/specific information and be sent to any email address you would like. Often, customers will use Power Automate to create this same functionality even though Power Apps can do this out of the box. Power Automate should be used for more complex solutions, such as the approval workflows. With Power Automate you can run an approval when a button is pressed, on a schedule, when an item is created or modified, and so on.
For many Power Apps solutions Power Automate is used to handle complex business logic. Do you need a way to make sure someone acted on the incident report that was generated by your app? Or, do you need a process to kick off every time new data is created in another system so Power Apps will have the data it needs? Do you need to check each morning to see if an inspection is due that day and then send an email with a link to your Power Apps inspection form? These are great uses of Power Automate to transform your app from a point solution to a fully featured business solution.
Power BI
Power BI is an analytics tool within the Power Platform suite. Power BI connects data from multiple sources and transforms the data into graphical visualizations to gain insights. It allows business users to utilize a number of different visualizations to build comprehensive reports and dashboards. When creating Power BI reports to view and analyze your app data, you have the ability to customize them for personal use and will only be accessible by you, providing you with a more unique and custom experience. If you need to share the report with others, you and each of the report consumer will need a Power BI Pro license. This license allows you to not only share the content but also control what others are able to do with the shared report or dashboard.
While Power Apps has capabilities to include simple graphs or tables, many solutions would be better served with a visualization provided by Power BI. Power Apps and Power BI have two options for seamless integration:
Embed a Power BI tile in a Power Apps app
By embedding a Power BI tile in a Power Apps solution, you are able to bring valuable visualizations into the app to allow the user to consume that data within the context of the app.
In the example below, you will see a simple Power BI Tile embedded in a Sales Planning app built in Power Apps. The visual is displaying the Profit and Gross Sales and the Power Apps form allows the user to enter sales predictions.

Embed a Power Apps app in a Power BI Dashboard
Another integration between these two applications, is to embed a Power Apps app in your Power BI report. This allows the user to act on data while never leaving the dashboard resulting in a better user experience. Consider an inventory management dashboard for a manufacturing facility. Without leaving the dashboard, the user can submit to purchasing an order for additional material. While the solution may have been utilizing both the Power Apps and Power BI platforms, the user simply experiences a complete end to end solution in one window on their desktop.
In the example below, we are analyzing the Sale Price and Profit by Country and Segment. Notice once you have embedded your Power App in a Power BI Dashboard you can navigate between screens.

In this next screenshot, still working with the same data as the previous example, you can utilize the native Power Apps features like Search with Power BI data.

In this last screenshot, for this example, you will see the embedded Power App is filtered by the Power BI selection.

Translating needs to the appropriate technology
To build the best solution, think through the use cases and determine how you want to collect the data, use the data, and analyze the data. Once you have determined how the solution will be used in each one of those cases, you can begin to select the right technology to execute each function.
It would be difficult to cover every use case and decision point, but to help you understand the decision-making process let’s explore sending an email via Power Automate versus sending an email via Power Apps. First consider the look and feel of the email, does your solution require special formatting of the email? To format the text of your email in Power Apps, like adding italics or bold text, you would need to write HTML. In Power Automate though, this functionality can be implemented by using the simple Design Interface that is provided out of the box.
Below are examples of the formulas to execute sending an email via Power Apps versus via Power Automate.
Send an Email via Power Apps

Send an Email via Power Automate

Also, the number of steps in your solution/process will aid you in determining which technology best suits your needs. Power Apps is great for performing simple solutions with minimal steps but as your solutions become more complex and requires multiple steps, Power Automate would be the better solution.
Again for this particular example, both technologies can provide the same solution, but there are little nuances that should be considered and thoroughly discussed during the design process to determine your requirements and help you choose the best product for your solution.
Let's not forget about discussing Power Apps and Power BI, and when to use one vs. the other. When deciding whether to use the basic charts, graphs, and visuals that come with Power Apps out of the box or to utilize a more powerful software like Power BI it really depends on your business solution and requirements. For example, if in your solution, you are wanting to add some basic graphs and charts to improve the apps overall look and feel while adding some visual flair for your users, Power Apps has you covered.
Here is a quick look at one of the simple, out of the box Power Apps charts.

Simple and minimal design above, nothing crazy but it gets the job done.
On the other hand, if your solution requires in-depth analysis of your data, and robust visuals, Power BI will be the best product for your solution. Keep in mind, with Power BI, each app user will need an additional license on top of the Power Apps license. This is a small price to pay though if our solution relies on intuitive dashboards, charts, graphs, and several other features to help you get the most out of your solution.

By identifying the needs of related Power Apps technologies in your solution and strategically implementing them, you will be able to provide your users with a better overall experience when using the solution.
Reference Links:

Power Apps related Technologies
Microsoft Power Apps works with other technologies to help you build powerful apps for your organization. Some of these technologies include: Data sources - Without data,
Are you tired of wasting your time with manual processes? Want a flexible workflow platform to automate communications and document management at your firm?
At the most basic level, the workflow platform has to be user-friendly and light to load in order for the stakeholders to use it on a daily basis. The platform should send out alerts and notifications to all the users, have easy log-in processes, integrate and work harmoniously with other softwares, manage and track documents, and provide analytics on the content that’s stored in it.
SharePoint Designs prides in taking up one-off novel projects that have challenging pain points and require a completely innovative business solution through Microsoft Office 365, especially SharePoint and Azure.
Problem
Conveyance firms act as a liaison between law firms and customers that want to buy properties. Conveyancing, for decades, has been a service that involves a colossal amount of manual labour. This legal process of buying and selling properties involves document, contract, and physical property verifications. The most important of all is managing the back and forth communication between customers, sellers, bankers, middlemen, legal advisors, and other third-party vendors.
One such conveyancing firm wanted a solution to leverage technology, and automate most of this tasks for all the stakeholders involved. This way, customers could engage in remote transactions instead of having to meet everyone in person. The technological solution could save time, efforts, and energy for all the individuals involved.
Solution
SharePoint Design’s team came up with a SaaS solution for the client where we designed a personalised cloud-based workflow platform using Microsoft Office 365. We were able to deliver the project to the client within one and a half months!
As opposed to Google’s SaaS and PaaS solutions, Microsoft’s solutions are more integrated. Therefore, using Office 365, we could build a workflow that allowed staff to create their log-in identities, authenticated them, stored all the company documents, gave a server space to host the workflow platform, and automated the organization of work emails in different folders on Outlook as well. We also built an Outlook plugin, a pop-up reminder for employees, asking them to organize emails into various folders if they were not already sorted automatically.
Technology
The team at SharePoint Designs used Angular 6.0, Graph API and Outlook API to come up with a fresh solution for the client.
You can build mobile and web applications with Angular. Add to that Microsoft’s Graph API, you have good productivity apps and workflow platforms. With Graph API, you can integrate these platforms seamlessly with other Microsoft products like Excel or Outlook, create calendars, retrieve and analyze data, organize documents, analyze user patterns and send out alerts, and do business forecasts in real time. Combined with the Outlook API, you could link your workflow platform to Outlook to send and receive emails. Whatever messages you send through your workflow platform automatically gets organized in various folders on Outlook as well.
Finally,
If you are looking to automate and scale up your business, we at SharePoint Designs provide PaaS and SaaS solutions. Leave it to a good integrated-technology platform that can do the job for you. Using SharePoint, businesses can achieve advanced technological feats.
Want efficiency, productivity, and smooth collaborations? Office 365 is the best integrated solution provided by Microsoft for all your business needs. Microsoft’s products have a competitive advantage over Google and IBM products as they can be integrated with one another seamlessly to build customized business solutions.

How Conveyancing in Canada was automated with a personalized SaaS solution
Are you tired of wasting your time with manual processes? Want a flexible workflow platform

Your current document management system (DMS) is not up to your expectations: there is still a lot of manual work involved to organize, search or retrieve files. Your important files are getting overwritten, and you are unable to keep the version history intact. Interdepartmental collaborations are a total mess. Your staff’s productivity takes a hit because they are busy sorting and organizing files most of the time. The server keeps failing and the current DMS is wasting your time and the company’s money.
Do not lose hope yet...
At SharePoint Designs we would like to share a case study on how we helped an accounting firm with a DMS that combines Microsoft's SharePoint technology with artificial intelligence (AI).
Problem
The account firm wanted several years worth of hard copy documents digitized, organized and placed in various folders. They files needed to be named appropriately with the corresponding dates of creation, organization name etc., for easy search and retrieval.
This was usually a manual task where in the staff, after scanning the documents, creates appropriate folders and subfolders to organize them. Then, the individual renames each of the files based on its type, the client it belongs to, date of creation, and version history. The documents could belong to a miscellaneous collection of financial, legal, letter, collateral, or other types. This strenuous process is not feasible or efficient for large firms that need hard copies digitized for various procedures.
Solution
SharePoint Design’s team arrived at a simple solution to automate this manual task by leveraging technology to create an AI metadata recognition system. For instance, the AI software reads the scanned documents line by line. It recognizes the unique elements in the document as instructed by a software code like date, organization’s name, logo, type of document, etc.
Accordingly, it creates tags based on keywords like date, document type, and organizational name to create folders and subfolders to rename the files and save them correspondingly. If there are different versions of the same file, the software retains the version history as well.
For instance, at the most basic level, this customized solution can do the following for you. Let’s assume that there are there are various edited versions of an invoice billed to an ABC Company. The AI software would create a folder for the company and subfolders for the year and month. Under these folders, there may be a subfolder named “invoices”. In this folder, the software may save the corresponding invoices by giving names such as “ABC. 3.9.2019. Invoice-1”, “ABC. 3.9.2019. Invoice-2,” etc.
More commonly, the accounting staff at various firms are usually indecisive about how to structure various documents, especially if the clientele is massive. In fact, the templates and formats of various documents would have changed over the years as well. Leave it to AI to do such immensely complicated tasks with ease. Years of machine learning and robust research with software codes has equipped the AI software to recognize documents even if they have extremely modified templates.
Technology
Our firm has combined SharePoint DMS platform with Azure Search API and Azure Cognitive Services to bring about a tailored solution for our client’s problem.
The SharePoint platform has multiple products that can be integrated with one another to get hybrid solutions for your most complex business problems. You can store and access files in a well-organized fashion.It works on multiple devices, let’s you collaborate with multiple users who can have a single log-in to access all apps.
With seamless workflows, user permissions and zero server problems, you can maintain document security, confidentiality and compliances. You could also do data analysis and reporting on all the content you have stored on SharePoint. It is extendable and its scope is expandable for you to build customized solutions for your unique business needs.
Azure is a cloud-solutions service that hosts all your data, applications, softwares, tools with a cloud or hybrid server. No need to set up expensive hardware anymore. All you have to do is just pay a monthly subscription to manage everything through Azure. Azure’s cognitive services help build intelligent applications with features like facial and speech recognition, visual detection, intuitive search solutions, etc. With the help of Azure AI, all your data can be read and analyzed without hassles to bring out the correct business outcomes for you.
So, free yourself from manual labor and become a decision-making authority to give your company that outstanding competitive edge in the market.

We saved 10000+ man hours for a firm with document management solutions.
Your current document management system (DMS) is not up to your expectations
Microsoft flow is a cloud-based workflow engine, Using Flow end users can create cross application workflows (no code workflows). Flow is a part of office 365 E3 suite. It is a successor of SharePoint designer workflows. Complex level Flows can be promoted to an Azure logic app.

Microsoft Flows Vs SharePoint Designer Workflows

Anatomy of Microsoft Flow
- Flow Designer
- Connectors, Triggers & Actions
- Variables & Data Flow
- Expressions
- Branching, Error Handling & Scopes
Flow Designer – Create a Flow from Browser or Mobile Application
Desktop Version
- Go to https://flow.Microsoft.com
- Sign-in with Office 365 Account
- Start from existing template or import from disk or create from scratch (both in desktop & mobile browsers)

Mobile Version
- Install flow mobile app, sign in
- Create new flow (template or from scratch).

Connectors
Connectors Wrapper around an API that allows Flow to talk with other services.It exposes Triggers & Actions.
Standard Connectors – included as part of E3
- Microsoft Connectors (SharePoint, Azure Blob storage, SQL Server.)
- Non-Microsoft Connectors (Twitter, Slack.)
- https://us.flow.microsoft.com/en-us/connectors/?filter=&category=standard
Premium Connectors – additional cost
- Microsoft Connectors (HTTP with Azure AD.)
- Other Connectors (Salesforce, MySQL.)
- https://us.flow.microsoft.com/en-us/connectors/?filter=&category=premium
Custom Connectors – additional cost , development
- ISV, System Integrators, End users can create custom connectors to integrate any system/application/service.
- https://us.flow.microsoft.com/en-us/connectors/?filter=&category=custom
Triggers
Run based on user action or event
- From other apps in office 365 – PowerApps, SharePoint, etc.
- From SQL
- From dedicated Flow button

Run on a schedule
- Flow also run based on time schedule, From every minute to 1 am on Days.

Run by HTTP GET/POST to URL generated by flow
- Call another Flow
- Call from any application/service/agent that can make HTTP calls

Scenarios & Types of Triggers
Triggers - Scenarios
- Simple: Flows start with a Trigger.
- Advanced: Flows can have more than 1 trigger (async actions)
- Custom: Flows can have custom triggers
Types
Polling Trigger
- Periodically checks the service
- Checks count as executions
Push Triggers
- Listen for data on an endpoint or wait for event.
Actions
- Execute CRUD operations with workflow context
- SharePoint: Create Item, Delete Item, Create File.
- SQL: Insert Row, Update Row, Delete Row, Get Row.

- Transform Data
- Inline – using expressions (e.g. string operations, math operations.)
- Other services – Html to text.


Send Notification
- Send mobile notification, send email notification etc.
Call other Flow
- Chain Flows to create complex Flows.
Variables
- Use Variables connector*
- Initialize & then set value
- Supported value types (Boolean, String, Object, Array, Float).
Variables are NOT always necessary!
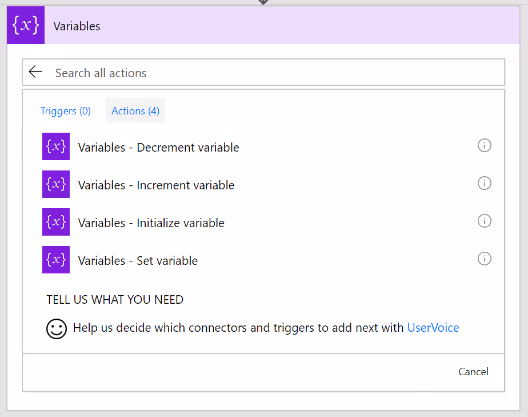
Why variables are not always necessary?
- Data Flows from each step and is available for all later steps
- ‘Add Dynamic Content’ allows us to select outputs from previous steps
- Certain outputs show up based on the types of the inputs and outputs.

Expressions
- Expressions can be used in most of the fields to transform data inline
- IntelliSense available as you type

Branching
- If-then-else

- Switch

For-Each
- By default, parallel
- Parallel (20 exec)
- Supports sequential

Do-Until
- Emulate State machines
- Help in approvals & more

- Parallel branches

Error Handling
- Actions can be set to run if previous action fails/times out.

Scopes
- Logically group actions
- Allow advanced error handling for a group of actions
- Scope boxes are in brown boxes.


Getting Started With Microsoft Flow
Microsoft flow is a cloud-based workflow engine, Using Flow end users can create cross application workflows. Flow is a part of office 365 E3 suite. It is a successor
Flow Template Overview
Flow templates are prepacked reusable flows for various business scenarios. Here is the link to View default templates already available in Microsoft Flow.
- From existing template in the public template gallery
- Search against the public template gallery
- Access this gallery from Modern SharePoint List/Library
- Filter & Embed the gallery in any page or application
- From existing template in a private template gallery
- Not available. Idea available in user voice.
- Discover flow templates

Discover Flow Templates from Template Gallery
There was one of many built in templates to build your flow from scratch for example Sending email to manager, send remainders to myself, Get weather of the current location, and lot more…
Navigate to templates and take a look at it choose your template customize it Save and run your flow with no code.

Templates – Discover from Modern User Interface (SharePoint)
In SharePoint user are able to create a flow from the modern UI with the help of flow button it suggest the default templates already available in the template gallery.

Templates – Discover (From Classic Page)
- Filter & embed the gallery in any application (not just in SharePoint or Office 365)
- Send the context of the current component (e.g. list name, library etc.) to the gallery
Microsoft Provides the SDK and use embedded IFrame source to integrate the Flow button in SharePoint list classic view. It works same as modern User Interface like able to pick the flow templates from classic window.

Templates – Create and Monitor the Flows
Create a flow that performs one or more tasks automatically after it's triggered by an event. We can create a Flow without using the default templates.
Below we created the simple approval flow template from the blank template. It triggers the flow when the SharePoint list item has been created then send email to the approve and capture the approval status send it to the initiator who create the item.
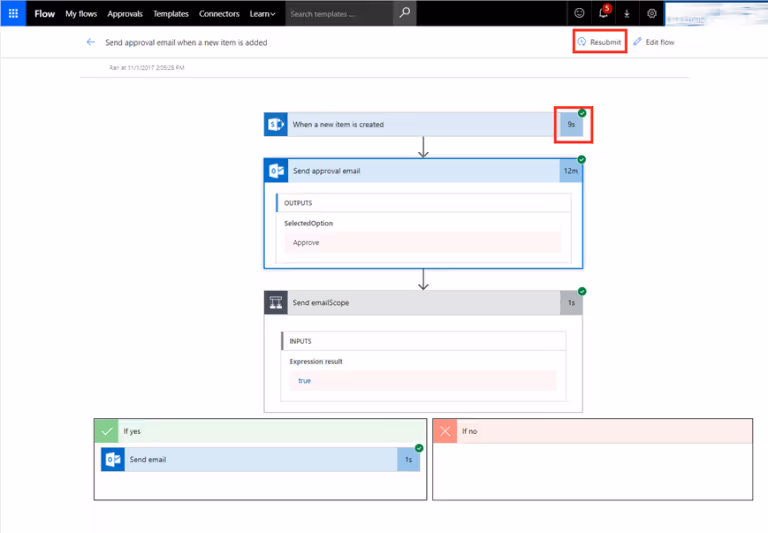
Templates – Publish
A flow which has run successfully can be published to public template gallery
- Sends the flow for review with Microsoft
- Takes days to weeks.
- Only generic use cases are usually accepted


Flow integration with non-existing templates
Flow templates are prepacked reusable flows for various business scenarios. Here is the link to View default templates already available in Microsoft Flow.

