Published Date -
4 Steps to Building Your Website with Power Pages: The Ultimate Guide

Power Pages is a remarkable low-code/no-code platform built on Microsoft Dataverse, designed for creating and managing websites with utmost ease. Even without prior coding experience, you can develop a website that's accessible to anonymous users, making it perfect for sharing public information. In this comprehensive guide, we'll walk you through the steps to create a stunning Power Pages site and offer valuable tips to ensure its professional appearance.
1.Step-by-Step Guide to Creating a Power Pages Site
- Access Power Pages: Start by visiting the Power Pages website

- Initiate a Free Trial: Click on the Try it for free button.
- Sign In: Use your Microsoft 365 account to sign in.
- Create a Developer Environment (if needed): If you encounter a message indicating that you can't create a site in the default environment, create a developer environment.

- Begin Site Creation: For initiating site creation, we have two options to choose from. Let's continue by opting to Start with a template.

- Select a Template: Choose a template that aligns with your site's purpose, whether it's for business, e-commerce, or personal use.

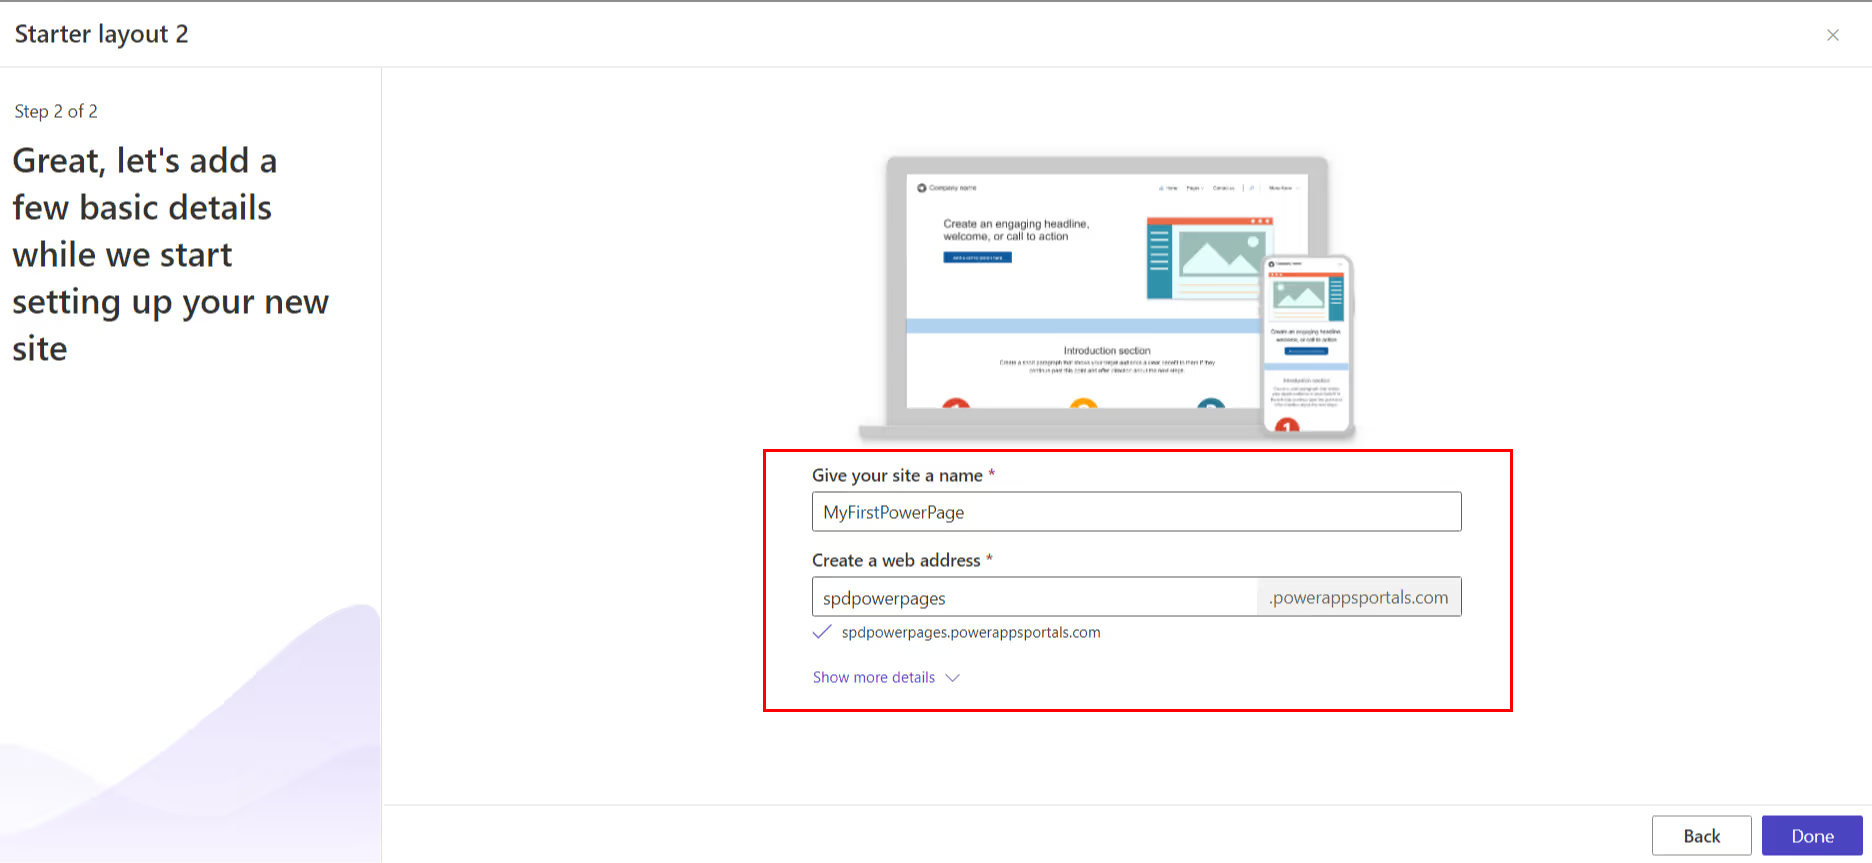
- Customize Site Details: Provide a name and web address for your site.

- Confirm and Proceed: Click Done to complete the initial setup.
2. Editing Your Power Pages Site
Once your site is ready, it's time to start editing. The Power Pages editor is user-friendly, featuring a drag-and-drop functionality to effortlessly add web parts from the Web Parts pane to your desired locations on the page.

To configure a web part, click on it, allowing you to adjust properties like alignment, links, and images.

3. Enabling Anonymous User Access
For sites that need to be accessible to anonymous users, follow these steps:
- Click Set up in the left navigation.
- Select Site visibility.
- Under Site visibility, opt for the Public setting.
- Click Set to public.

4. Preview and Go Live
Before going live, it's crucial to preview and ensure your site looks its best. You can do this by clicking the "Preview" button and choosing between the "Desktop" or "Mobile" options to test on various devices.

Sync your website. Once you are happy with your website, you can Sync it so that it is live and accessible to your users.

Tips for Crafting a Professional Power Pages Site
- Choose the Right Template: Select a template that complements your site's purpose and appearance.
- Quality Visuals: Incorporate high-quality images and videos to enhance visual appeal.
- Clear and Concise Content: Craft content that is both clear and easily comprehensible.
- Proofreading: Always proofread your content meticulously before publishing.
- Cross-Device Testing: Ensure your site functions seamlessly across different devices and browsers.
Examples of What You Can Create with Power Pages
- Create a company website to showcase your products or services.
- Establish a blog to share your expertise with your audience.
- Develop a knowledge base to offer support to your customers.
- Design an event website for promoting and registering attendees.
- Build a community website to facilitate user interaction.
Conclusion
Power Pages is an incredibly versatile platform for crafting professional websites, accessible even to non-coders. Its unique feature of allowing anonymous user access is a significant advantage for businesses seeking broader information sharing. To create a cohesive and successful site, remember to maintain consistent branding, implement responsive design, prioritize accessibility, keep content updated, and actively promote your site on various online channels, including social media. With these guidelines, you're well on your way to building a remarkable online presence with Power Pages.


